Showing posts with label eggshell candles. Show all posts

Thursday, April 17, 2014

Tutorial - Eggshell Candles Part 2

Last time I demonstrated how to make candles in eggshell halves. Today we're going to take a crack at making a candle using the whole egg. If you need a refresher on the materials needed, you can view that here.

Eggshell Candles # 2


We are going to use the whole shell of the egg for this. However we don't want the insides. With a pin, carefully poke holes in the top and bottom of the egg, enlarging the holes to about 1/4" wide.


Over a dish, blow into the egg. At first you will need to use a bit of force, but when the egg white/yoke starts flowing it will be much easier. Save the insides for future baking.


Rinse the egg shell well, and let dry completely. Cut wick to size, leaving lots of extra length. It is easier to trim the wick later than to work with wicks that are slightly too short. Prepare the wick like we did last time in Part 1, dipping the wick into the melted wax, cooling for a couple seconds, then pulling straight. Insert the wick into the eggshell: having a slightly stiff, straight wick make this a lot easier.


Cover the "pointy" end, or the side you want to be facing up, with your putty. Be careful not to break the egg shell; it is hollow now and much more fragile. It helps to roll the putty a bit to warm it up and easier to work with that way.


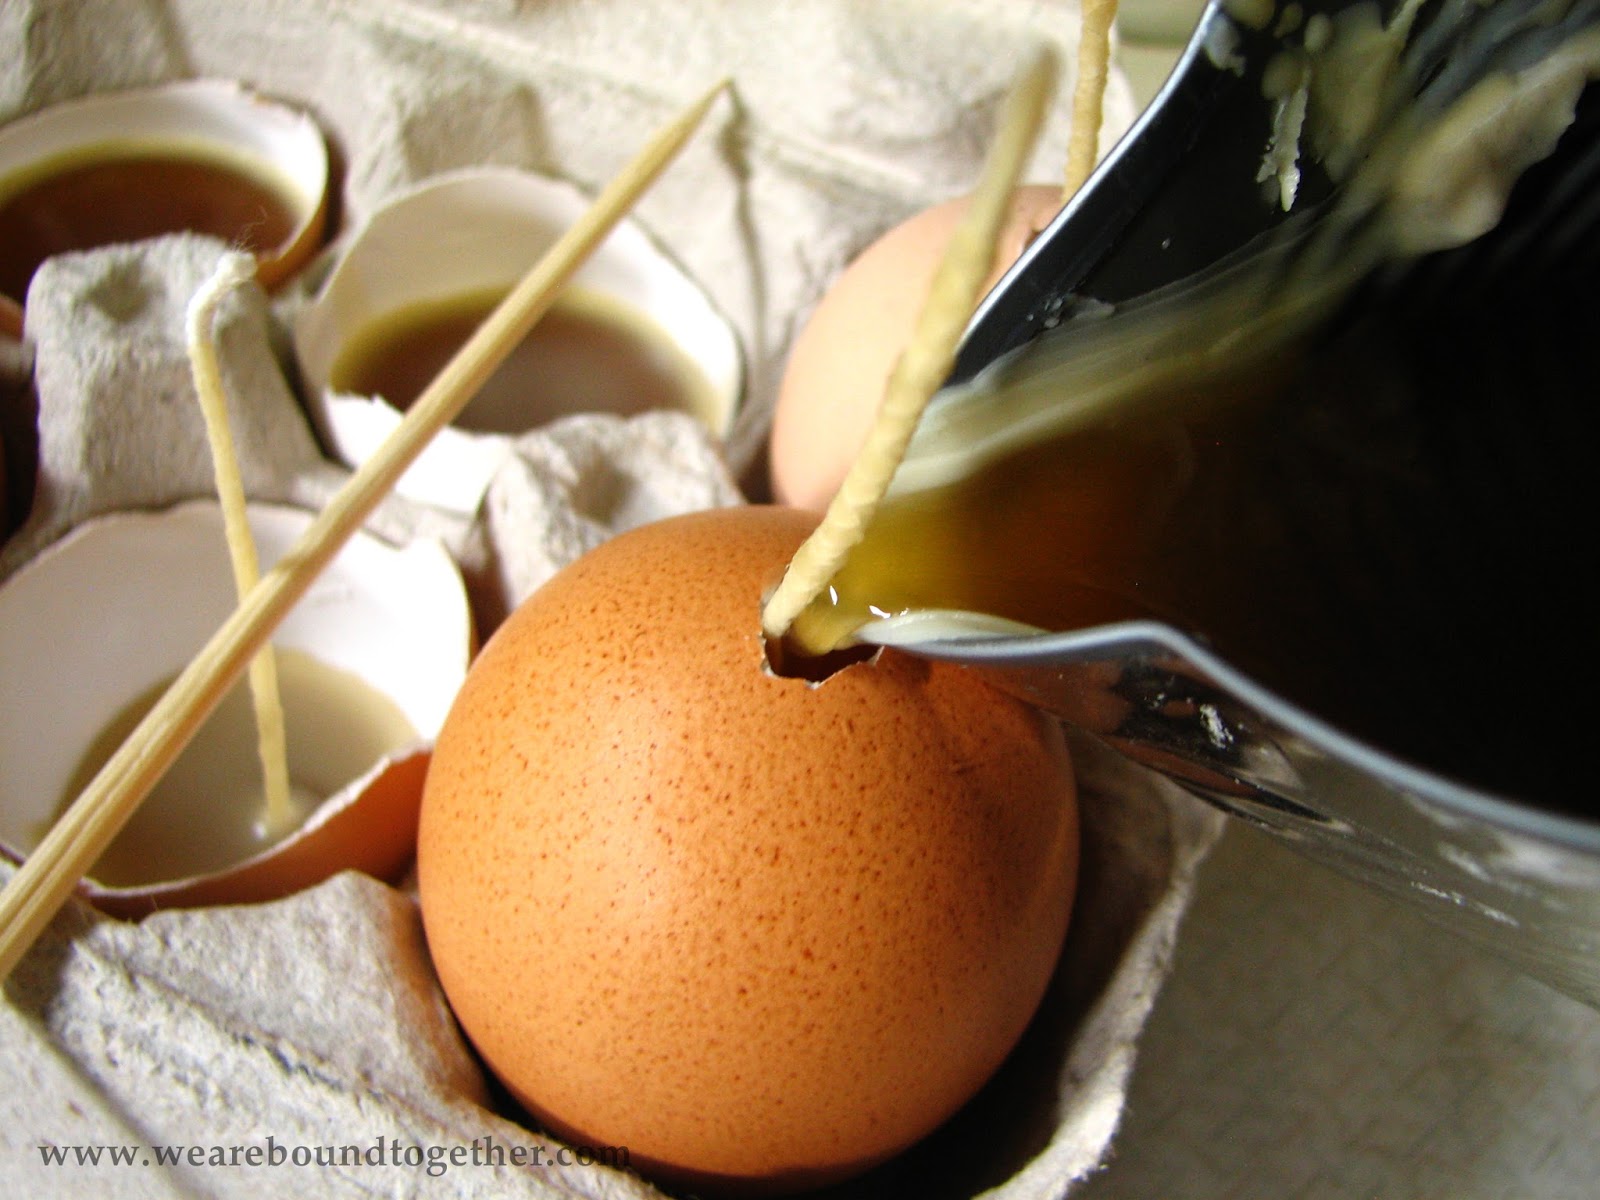
Place the egg, putty side down in your egg carton and fill with wax. You will want to make sure to fill the egg all in one go, not letting it cool in layers, or you will get ridges or lines in your final candle. Eggs hold a surprising amount of wax, but pour slowly because once it reaches the top it can make quite a mess.


Let cool completely. The egg itself will feel warm for quite a few hours afterwards. It is best to wait overnight to make sure all of the wax is hard. Once fully cooled, gently peel back the shell of the egg to reveal your candle.


If desired, you can flatten the bottom by trimming or rubbing on a hot pan, to allow it to stand on its own. Or you can display in eggcups. Be sure to trim wicks before lighting.


This post is written by Andrea Davis and originally appeared on www.weareboundtogether.com

Tuesday, April 15, 2014

Tutorial - Eggshell Candles Part 1

Easter is coming and here is a neat way to decorate with eggshell candles! There are a few different ways to make candles with eggshells. Today I will introduce you the first of different methods and types of eggshell candles.


Materials for parts 1 and 2: 
Whole eggs
Eggshell halves
Egg carton
Cotton wick
Wick tab (optional)
Sticky Tack or similar type putty
Tin can
Beeswax
Scissors

Take a clean tin can to use as a container to melt the wax in. Tin cans are great because you don't have to worry about cleaning the wax off the can when you are finished. Tin cans are also handy to use for pouring the wax as you can easily dent a spout for less mess.


Melt the wax in your tin can. You want to be careful when melting wax; it is important not to let it heat up too much. A safe way to melt wax is in a double boiler. By placing my wax tin in an old pot of water, I can easily and cheaply mimic a double boiler.

Egg Shell Candle #1

Save eggshell halves when using eggs. Wash the shells and let dry. Place the eggshell halves in the egg carton while you prepare your wicks. Cut wicks the approximate length you would need for each eggshell, but be generous. Over-estimate the amount you will need. Wicks will be trimmed when finished. If you don't have the metal wick tabs, that's okay! I will show you two different methods of how to place your wick.


 Dip the wicks into your melted wax. Let the wax cool for a couple seconds, then pull straight.


If you are using the wick tabs, place the wick with it's tab in the eggshell and cover with a bit of the melted wax. You may need to support the wick with a stick as the warm wax will soften the wax on the wick.


If you do not wish to use the wick tabs, simply fill the eggshell 3/4 of your final wax height and let cool until the top starts to harden.


Once the top is hardened a bit, take your waxed wick and poke it into the center. The wax underneath will still be liquid. The wick should be able to stand up in the wax.


Fill the eggshells the rest of the way using sticks as a support if the wicks start to droop.


Set aside and let cool completely. After several hours, when the wax is fully solidified, you may trim your wick down to about 1/4". Tune in next time when I show you how to make another type of eggshell candle in Part 2!

This post is written by Andrea Davis and originally appeared on www.weareboundtogether.com