Showing posts with label etsy shop basics. Show all posts

Thursday, April 10, 2014

Thursday Etsy Tips - Creating a Coupon

Did you know that you can create coupon codes for your Etsy shop?

You sure can! Coupon codes are a great way to thank your customers, promote your shop, and appease a customer is a not-so-nice situation. There are many options for coupon codes, and you get to set the amounts. You can create up to 100 coupon codes, so you can create one to suit any need you may have.

To get started go to the drop down menu which appears from the "Your Shop:" link, located from the top right hand corner of most pages.


If you have never made a coupon you will be greeted with an offer to do so.


Click the Create New Coupon button to get started.


One very important thing to remember is that once you make a coupon code, you cannot edit it, and you can not make it again. For this reason, it is advisable not to delete any of your coupons after they have been made, you never know when you want to activate it again.

You can add personality to a code, to help people remember to use it such as the event (boxing day, thank you) and/or the amount offered.

If it as "Thank You Coupon" then you may check the corresponding box to get Etsy working for you in sending out the code automatically to each buyer upon purchase.

The Discount Type can be either free shipping, with the option to have it valid on domestic shipping only, percent discount off the entire subtotal (before shipping or tax), or a fixed discount, or dollar amount off the order.

You can further customize the coupon options by setting a minimum purchase that must be met before a coupon can be applied, encouraging the customer to order more.

The expiration date is just that. When they expire, the codes do not get deleted, but simply get set to "inactive".

Check active or inactive, depending on if you want to code to be available immediately or sometime in the future.

Click "add coupon" and your good to go!


All of your codes will be displayed on the Coupon Codes page. Here you can keep track of how many codes you have, discount type, the date they were created, how many times the code has been used, expiration date and their status.

To change the status of a code, simply click over Active or Inactive and a window will pop up giving you the option to do so.

You now have the ability to pass these savings onto your customers and promote your shop! Some ways to promote your coupon codes are on business cards, blogs, Facebook, Twitter or even in your shop welcome message.

Hope it brings some business your way!

For more Etsy tips see;

Getting Started (Opening a shop)
Setting up Shop (About Page)
Info and Appearance Section
List an Item
Shop Policies 
Shipping Profiles
Shop Selections 
Listings Manager Part 1 Active Listings 
Listings Manager Part 2
Etsy Mini

Andrea Davis resides in Winnipeg. A proud member of WEST for 2 years and the owner of "We Are Bound Together", a shop where 100% of the proceeds go to charities. Check out her shop, or blog.

Thursday, March 13, 2014

Thursday Etsy Tips: Listings Manager Part 2


Last time we started taking a look at the Listings Manager, specifically the Active listings tab. Today we'll delve into the remaining tabs.


The Draft Listings contain the items you have written a listing for, but have not yet published. To place an item in the Draft tab, when listing your item, simply click "Save as Draft" rather than "Publish" and your listing will be saved until you wish to publish it.


Very similar to the Drafts, if you have an active listing which you wish to take out of your shop, but don't want to get rid of it altogether you may deactivate the listing. Deactivation is a great option for a number of things. For example if you sold the item at a craft sale and intend on making another one for your shop. Deactivating saves you the time of completely relisting your item again. Likewise this is helpful if you noticed a mistake after listing and need to correct it before making the listing live again.

You can deactivate a listing by viewing the item you wish to deactivate.


Or if you would like to deactivate multiple listings, you can select them from the Active tab and click the Deactivate button.


The Sold Out tab lists all the items which have been purchased and are no longer available in your shop. If you have indicated that you have multiple quantities of an item, the item will simply renew itself when it is sold. If you make one of a kind items, this tab will eventually contain a lot of items. If you create another copy of an item that has sold, then you are able to copy or edit the item in order to relist.


As mentioned in Part 1, if you fail to renew a listing before it expires, not to worry! The listing will not be deleted and all your hard work lost. The expired item will simply transfer to the Expired tab.

The last tab in your Listings Manager is the Featured items. The featured items appear as the very first row of your Etsy shop and are a good way to highlight items which you would like to be most visible.

www.weareboundtogether.etsy.com

Featuring items is optional. You can select your items you wish to feature by selecting the star to the left of the item listing in the Active listings tab. The star will turn yellow to indicate the item is featured. You can only feature 4 items at a time. However, you may "star" a couple items extra to insure that you don't have any blank spaces in your featured bar if one of the items expires.


Once you have chosen your featured items, you may rearrange their order as you wish from the Featured tab.


Now you are well equipped to manage your listings and keep track of your items!

For more Etsy tips see;

Getting Started (Opening a shop)
Setting up Shop (About Page)
Info and Appearance Section
List an Item
Shop Policies 
Shipping Profiles
Shop Selections 
Listings Manager Part 1 Active Listings


Andrea Davis resides in Winnipeg. A proud member of WEST for 2 years and the owner of "We Are Bound Together", a shop where 100% of the proceeds go to charities. Check out her shop, or blog.

Thursday, February 27, 2014

Thursday Etsy Tips: Listings Manager Part 1 Active Listings

As the name suggests, your Etsy Listings Manager helps you keep tabs on your listings. This includes both active and various forms of inactive listings.


You can find the Listings Manager by hovering over "Your Shop:" which is found in the top right corner of any Etsy page.


The first page that will be visible is the Active listings. Other than stating the obvious, the Active page lets you perform a lot of editing without the need to go through each individual item's page.


When you hover over the item, pencil icons will appear to the right of the information that can be edited right in the listing manager. These include quantities (In Stock), Price, and Shipping Profile. Click the "pencil" to edit and then the check to save.


You can also bulk edit by checking the corresponding box to the listings you want to edit.


Bulk editing can be applied to "Renew," "Deactivate," or "Delete" multiple listings, or to apply Shipping Profiles or Listing Variations

Editing Shipping Profiles will appear in a pop up window specific to the items selected. To edit multiple listings with multiple profiles, see our Etsy Tips: Shipping Profiles.


Editing the Listing Variations will bring you to a new screen. Here you can add the items selected to a different category. (If you've found a certain category more appropriate for your items.) Or you can add Variations to certain items. (For example if I started offering lined pages of the same books and wanted to have both blank and lined in the same listing).


You have the option of applying the above changes to either all your active listings or all listings in a certain Shop Selection (even if you hadn't selected each of the items) or only to the listings you originally selected.


From the Active Listings tab, you can also view when each of your listings will expire. You can click the Expires link to sort your listing by date. Select the items you with to renew and click renew. You will then be asked clarify if you indeed do want to renew, or you can cancel. Each renewal is $0.20, just as when the item was first listed.


If you do not renew before the listing expires - that's okay! Expired listings will not be deleted, they will simply be removed to the Expired tab.

More on that next time! Tune in later for Thursday Etsy Tips: Listings Manager Part 2

For more Etsy tips see;

Getting Started (Opening a shop)
Setting up Shop (About Page)
Info and Appearance Section
List an Item
Shop Policies 
Shipping Profiles
Shop Selections 

Andrea Davis resides in Winnipeg. A proud member of WEST for 2 years and the owner of "We Are Bound Together", a shop where 100% of the proceeds go to charities. Check out her shop, or blog.

Thursday, February 6, 2014

Thursday Etsy Tips: Shop Sections

Shop Sections are a way to keep your shop organized. It is not only easier for you to assess what is in your shop, it also makes it easier for customers to browse. Rather than looking through all of your listings, customers can simply go to the section which highlights the specific item they are looking for.

For example, if you make clothing of all sorts and a customer only wants a skirt, having your items categorized by type of clothing will ensure that the customer doesn't miss that great skirt hiding past the listings of shirts, pants, etc. 

This is true especially as you add more items to your shop. A customer may not have the patience to look through several pages of items.

You can have up to 10 shop sections. However shop sections that don't contain any items will not show up on the menu.

Shop Sections appear on the left hand side of your shop and include the number of items in each section.


When creating or editing a listing, you can add the item directly to the shop section.


However, if you are editing multiple listings there is an easier way. You can access the shop sections section by going to the Info & Appearance page.


From there you will see the Sections link, located under the Listings heading.


Here you can edit sections, add items to sections, and even rearrange the order of the sections.


To edit the section title, click the pencil icon (red arrow below). Be sure to save your edits when done. Or you can simply delete the section if that is preferred. If you have items in the sections you deleted, they will not be lost, they will just appear in "all items."


You can add listings to a section, or edit which sections are linked to which items. Check the box of the corresponding item(s) and make your selection from the drop down menu at the top. You must click "Save" for the changes to be made.


If you don't like the order the sections appear in the menu, click the symbol to the left of the section title and drag it to where you would like it to be placed.


As time goes on, and your shop gets established and fills up, you may need to edit the shop sections a few times to better suit your evolving store.

For more Etsy tips see;

Getting Started (Opening a shop)
Setting up Shop (About Page)
Info and Appearance Section
List an Item
Shop Policies 
Shipping Profiles

Andrea Davis resides in Winnipeg. A proud member of WEST for 2 years and the owner of "We Are Bound Together", a shop where 100% of the proceeds go to charities. Check out her shop, or blog.

Thursday, January 23, 2014

Thursday Etsy Tips: Shipping Profiles

Etsy has created Shipping Profiles to save you time when applying shipping costs to your listings. You can create a new Shipping Profile for each price point. Once the profile is complete, it can be added to or removed from a single, or multiple listing from the Shipping Profile page, without having to go into each and every listing to update the shipping costs.

Create a Shipping Profile

You find your Shipping Profiles by going to the Info and Appearance Section.


In the menu on the left hand side of the page you will see a link for Shipping Profiles, located under the Listings heading.


This will bring you to the page where you can see and manage all of your profiles. From here you can click "edit" to make changes to an existing profile or create new profile.


Click the "Create New Profile" button to go to the next screen and fill in the appropriate information.


For Profile Name I like to use a description of the items I attach the particular profile to. For example my regular journals are one price point, shipping wise, so I just use the profile name of "journal" while my "small journals" have a different shipping cost and their own profile. You can name your profiles anything you like, as long as you know what they are, no one else will see the profile name but you.

Processing Time refers to how long it will take you, the seller, to get the item in the mail. It is not the shipping time. You may want to include shipping time estimates in your Policies section.

Ships From refers to the country that you are in, where the package will be coming from.

As a default, you will ship to your own country. Fill in your shipping information with the help of the mail service provider in your country (eg. CanadaPost). You may also ship to other countries if it is your preference. This is highly recommended as you will greatly increase your customer base this way. (You really want to ship the the US if you are a Canadian.)

As an option, you may also join the "Shipping Upgrades and Shipping Profile Improvements" team to get the add shipping upgrades option you see in the bottom left corner in the above image.


The Shipping Upgrades are great for offering faster shipping times, (XpressPost, Expedited) or for us Canadians, shipment tracking upgrades as this does cost more.

Click "Create Shipping Profile" and your ready for the next step!


Link Shipping Profile to Listings

Having shipping profiles are only useful if they are applied to listings. You may apply a shipping profile to as many listings as you need. To do this go to your Listings Manager, found by hovering over Your Shop: in the top right corner of any page.


This will bring up a list of all your listed items.


The heading marked Shipping indicates which shipping profile is applied to the corresponding item. As you can see in the above image, I have three different shipping profiles applied to the journals.

To add or edit which shipping profile is applied, click the "pencil" to the right of the shipping profile name (red arrow in above image). Simply click on whichever profile you would like to add and it is updated automatically, no need to "save".


As you can see this is an excellent time saving tool, especially around this time of year when shipping prices change.

For more Etsy tips see;

Getting Started (Opening a shop)
Setting up Shop (About Page)
Info and Appearance Section
List an Item
Shop Policies 

Andrea Davis resides in Winnipeg. A proud member of WEST for 2 years and the owner of "We Are Bound Together", a shop where 100% of the proceeds go to charities. Check out her shop, or blog.

Thursday, January 9, 2014

Thursday Etsy Tips: Shop Policies

Why are Shop Policies Important?

Filling out your Shop Policies sections is a wonderful way to protect both you and your customer. Here you will be able to answer most of your customers' questions before they even ask, set clear guidelines on important stuff like shipping and refunds, and make your shop, well, more like a "real" shop. Your shop is a real shop: treating it like one will make both yours and your customers' experiences much better.

Not having this section filled will cost you sales. If a customer has a choice between your store and a very similar one with clearly laid policies, guess which one will get the sale? A customer will often rather click the "add to cart" button on someone else's shop, than "contact seller" in yours.

Shop Policies offer protection to you as a seller. You will also reduce the amount of customers contacting you about when their item should arrive, if you do refunds, etc. and give yourself a solid foundation in a case of a dispute.

Let's get started!

As always, make sure that your policies are in line with Etsy's Seller Guidelines and Terms of Use.

Your Shop Policies are located in the Info & Appearance, which you can find by hovering over Your Shop: found in the top right corner of any Etsy page.

On this page you will find tabs to different sections. We already took a look at the Info & Appearance, and the About Page. Click the Policies tab.


Now it's down to a matter of filling out the sections.

Your Welcome Message is just that, a short little welcome note. It doesn't need to be a reiteration of your About Page, and it doesn't appear in the items listings.

The Payment Policy is where you can indicate which methods of payment you take. Is it just PayPal or do you have Direct Checkout as well? Don't assume that your customers knows what cards are included in Direct Checkout, list them too.

The Shipping section may need to have the most information.
- Do you ship Internationally?
-What method do you use to ship with? Air? Surface? Are the packages tracked?
-What are the estimated shipping times? (Remember this is to protect you, and have happy customers.)
- Do you offer shipping upgrades?
- Who is responsible to cover extra customs fees, tax, or brokerage fees?

A Refund Policy is also very important. If you do not accept refunds, then state this. Just leaving this section blank does not clarify the issue. Depending on what you sell, you may not wish to accept refunds. If you do accept refunds clarify who is responsible for the shipping and any time restrictions.

There is even a spot for any Additional Information. This is a place to answers some Frequently Asked Questions, information about custom orders, or generally anything not covered in the above sections.

The final section, Seller Information, is related more specifically to parts of the European Union as some countries require certain information such as your name, physical address, tax number, etc. If this information is not legally required (by your country) you may leave this blank.

Don't forget to click "Save" or your hard work will be lost!


A good habit to get into is to check up on your policies from time to time. As you gain more experience in selling, or even as a customer, you will be able to update your policies accordingly.

For more Etsy tips see;

Getting Started (Opening a shop)
Setting up Shop (About Page)
Info and Appearance Section
List an Item

Andrea Davis resides in Winnipeg. A proud member of WEST for 2 years and the owner of "We Are Bound Together", a shop where 100% of the proceeds go to charities. Check out her shop, or blog.

Sunday, October 27, 2013

Always Wanted To?

Have you always wanted to Sell on Etsy?


Artist Bootcamp: Sell Your Craft-Based Work Online with Ruth Smith, captain of WEST
Tuesday, October 29, 7-9:30 pm
611 Main Street
Winnipeg, Manitoba
Free for MAWA and ACI members, $10 for non-members
No need to register, just show up

Do you create an awesome craft that needs a broader audience? Looking for an online venue that keeps you creating without the hassles of finding quality craft sales or stores?

This workshop will walk you through the basic steps of launching online by showing you how to set up a successful shop, and how to grow it and succeed on a popular platform. Bring your questions and join in the discussion as tips and tricks for selling your crafts online are shared. Come and learn how selling your crafts online can open up opportunities!

Ruth Smith was born into a maker family and has been creating crafts since macramé was first in. The chief creative force behind Periwinkle Designs, she has been an online seller since 2008 on multiple platforms with close to 500 online sales. Smith is also the captain of a local online street team and has been supporting local online sellers by organizing team events since 2009. A professional project manager by day and craft maven by night, Smith balances the demands of running a small business and raising a family. www.mawa.ca

Thursday, October 3, 2013

Thursday Etsy Tips: List an Item

We've now registered a shop on Etsy, personalized the Info and Appearance section, and learned about branding. All this gives you a solid foundation for a great shop.

But what's the point of having a shop without filling it?

List an Item


Listing an Item is easy. However there are some tips to make your listed item more likely to get found in the Etsy searches.

First, Etsy requires some basic information About the Item. This refers to who made the item, what it is (a finished product or a supply) and when it was made. This may seem like a "no-brainer" but not everyone on Etsy makes a finished product. There are also vintage sellers who do not make their own product and there is room for a shop to be co-run, keeping in mind that all members must be listed on your About page.


Categories help to narrow down where your item will be found in search. Sometimes more than one category would be appropriate for your item, however you can only pick one for each item. Since you will always be adding to your shop, a good way to be found in different searches is to add one item under one category and then next time you add a new item you can place it in a different appropriate category.

Indicate whether your item is a physical item or a digital item. If your item is digital (eg. pattern, template, etc.) then you will then be prompted to upload the file.

Variations only apply to physical items. This is a handy way in which you can list simple variations on a product without having to list multiple items. This can especially be helpful for orders in which simple details can be customized.


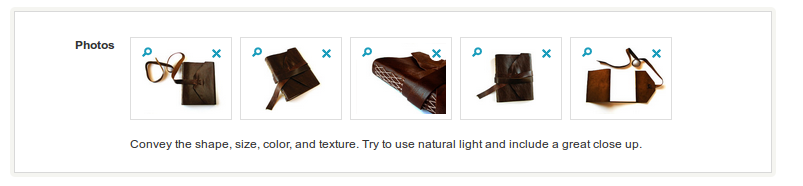
Upload photos. Photos are very important for selling online. Photos need to convey almost every aspect of your item. Customers do not have the benefit of being able to touch or hold your item, so your photos really need to say a lot. You can find some photo tips here. Be sure to use all five photo slots. Be creative, using different angles and distances.


Keep in mind that photos should be between 800 - 1000 pixels wide. The height can be variable, but images more than 1000 pixels square don't upload so well. Etsy automatically crops your image to fit. You can adjust your first photo (the one that will appear in search) when you "Preview Listing" which brings you to a page prior to publishing, but it is a bit limited in what it can edit. There are many free programs out there that can help you with photo editing prior to uploading.


The Item Title will help narrow down your item in search. It is important not only to have a descriptive title, but also an accurate one. Try searching as a shopper. Can you find your own item, or similar items with your title? Try to have the key search words near the beginning of the title, as they will carry more weight in search. You have up to 140 characters, but make them count. While descriptive titles are a must, don't feel like you need to say everything. That's what the Description section is for.


Some people like to have long Descriptions, but I think it's best to be short and sweet. You don't want to lose people before they find out what your item is made of. If something special inspired this certain item, then say it; people are interested. But if there is a long story behind your creative process, the About page might be a more appropriate place for it.

Potential buyers want to be able to see what the item is, materials used, the item size, shape and colour, and possibly tips in how to use it or other special instructions. If you have similar items it is helpful to put a link here also to keep traffic in your shop.


Shop Sections are optional, but they are a great way to keep your shop organized. Maybe someone likes your style, but doesn't want to go through your stuff page by page. Sections help the buyer find exactly what they are looking for. They also help advertise other products you have. They might not realize what else you have in your shop until they see the nice little menu of the left sidebar saying what's there.


You can have up to 10 sections. These can be categorized any way you like; what would work best for you really depends on your store. I sort mine by item type. However if your store is all one type of thing, then sorting by colour or size may be best.


There is a place for Recipient, Occasion, and Style. These are optional and they may even damage your searchability. It is great if you have something for a special occasion (eg. Christmas, Wedding, Halloween), but if it can be for both something specific and general (eg. Wedding or special gift) then it's best to leave this spot alone. 


Tags are basically another name for search words. You want to have descriptive keywords that match what someone will look for in search. Keywords include things that describe the style, colour, texture and technique. Again think of yourself as a customer looking for your exact item. How would you type it in when searching for it? Tags can have up to 20 characters and be more than one word. You have 13 tags: use them all!


Materials may seem a lot like Tags but they are not. Materials gives your customer a simple and clear overview of what your item is made of. You can have up to 14 materials listed, but these will not show up in search, so don't worry about going overboard. 

Price is something that all sellers struggle with at one point or another, and eventually need to recalculate. When you make your item, be sure to calculate how much the materials cost and how long it took you to make it. 


Another great feature is the Quantity. You can indicate that you have multiples of the same item. When your items sells, it will remain active and you will only be charged the listing fee once that has happened. This is also great if people want to buy multiples of your item. 

Shipping information is vital. If not filled out correctly there can be lots of confusion and unhappy customers. To make things simpler, Etsy has incorporated Shipping Profiles which you can set up beforehand to streamline things. 

The shipping section communicates to your customer the processing time, country of origin and how much the shipping will cost. 
 

Processing time refers to how long it will take you to get the item in the mail. This is different from your creating time if it is a custom order. Time for making a custom order needs to be clearly identified directly to the customer and/or in your description. 

You have the basic cost of shipping. If a customer orders more than one item, whatever you put in the "with another item" space will be added to the basic cost.

You can choose if you would like to ship internationally or not. This is an option, but you have a much larger group of people to sell to if you do. To ship to other countries simply click "add location." You can add either individual countries or "everywhere else."

Now click "Preview Listing" and you will be directed to a new screen where you have a chance to see exactly how your listing will look before you publish it. 

How does it look? It it a good first photo? Are there spelling mistakes? You can either "edit" and fix these, "save as draft" for publishing or editing another time, or go on to "publish."


Once you hit the "Publish" button, your listing is live! Post it too your Facebook or Tweet for more publicity.


Keep listing items and pretty soon you will have a store full! The more items listed the better the chance in being found on Etsy.

Andrea Davis resides in Winnipeg. A proud member of WEST for 2 years and the owner of "We Are Bound Together", a shop where 100% of the proceeds go to charities. Check out her shop, or blog.