

Today I will show you how to make the Petal Tree. This is probably tied for my favourite with the Lace Ruffle Tree, it worked out SO well!
Here's what you need:

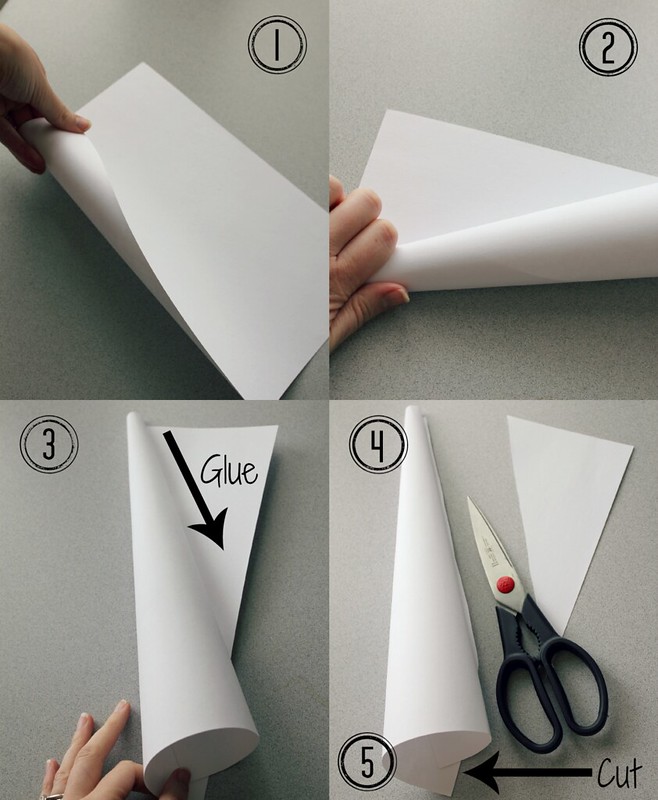
Start off with your cardstock tree base:
1. Start to curl the paper in at a corner
2. Make sure the top is tighter than the bottom, in a cone shape
3. Put a line of hot glue from top to bottom, roll into glue and hold until dry
4. Cut off excess paper, then do another line of glue from top to bottom to secure this seam
5. Cut off excess paper, making sure to cut it on an even surface so it stands properly. This will just be trial and error.
Here's what you do:
Instructions:
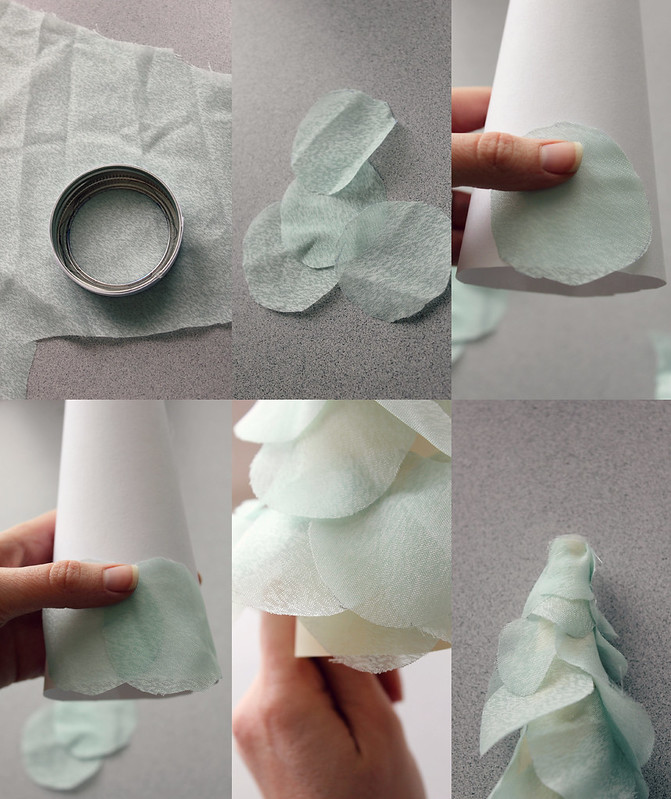
1. Trace 2 different sizes of circles. For this I used the lid from a jar, and for the smaller size I used a large thread holder-not pictured--just as long as the smaller ones are visibly smaller than the bigger ones.
2. Glue the circles around the base of the tree so that the bottom of the circles graze the 'ground'. I did the large circle about halfway up the cone and then switched to the smaller ones.
3. About halfway up, switch to the smaller circles so that it starts to become more tapered; don't go quite all the way to the top
4. For the very top, use 2 small circles, but wrap them tightly just at the very tip. The bottom of the circle should still be loose, giving that look of a petal, but the tightness at the top helps with the tree look ;)

Voila! Pretty petal tree.

so pretty!!
ReplyDelete