Showing posts with label holiday tutorials. Show all posts

Wednesday, December 16, 2015

Holiday Treats Pt.2


This is a cute way to christma-tize some cupcakes! Here's what you need:

Cupcake mix (I used a simple devils food mix from the store), icing (I made a chocolate buttercream), nilla wafers, small twist pretzels, brown and red m&m's, small mints, mini chocolate chips

Start with your cupcake


1. Add the Nilla wafer 'nose' base


Dab some icing on the M&M and press it onto the nilla wafer


Add the pretzels first (what I should've done in the video), then the mints!


Dab some icing onto the mini chocolate chips, press onto the mints and voila!  Dasher, Dancer, Prancer and Rudolph all wrapped up in a tasty treat!  Click here for the video tutorial.

Reposted from Heidi-and-Seek

Sunday, December 13, 2015

Holiday Treats Pt.1


Last year I made two Holiday Treats that I was able to share on Breakfast TV Winnipeg and I'm here to share the recipes with you!


Here's a fun treat for you to try this Christmas-it's super tasty and SUPER fast to whip up (like 15 minutes max fast!) at the last minute for a gathering!

Here's what you need:

Small pot and glass bowl or double boiler, pretzel sticks, white chocolate melts, Christmas M&M's, Cheerios, and Chex Cereal.
Instructions:
1. Add 3 cups of Cheerios and 3 cups of Chex mix into a large mixing bowl.
2. Add 1 cup pretzel sticks and 2-3 Cups of M&M's (If you love candy canes like me, you could also add candy cane bits here if you like!)


3. Boil water in a pot


4. Put 24oz. (1.5lb) of white chocolate melts into a glass bowl or double boiler in the pot and stir them around until they begin to soften


5. Keep stirring until they have all melted into a lovely goo!


6. Once the chocolate is melted, pour it into the cereal mixture and stir to coat entirely!
7. Pour out onto a sheet of waxed paper, and let it sit for at least 4 hours.  I let mine set overnight on the counter and it was perfect the next day.

Here is a video tutorial on how to make this:


Feel free to try any kind of combinations you like to smother in chocolate, and even try other chocolates!  Here I've done the same ingredients with semi sweet chocolate-yum!


Enjoy!  

Saturday, December 20, 2014

skip the gift wrap with Caitlin / Real Swanky!


This Tutorial Tuesday, Caitlin of Real Swanky will be showing us how to wrap gifts without the use of paper! It's a great way to utilize your..
  • spare fabric
  • a bandanna
  • a cute vintage handkerchief
  • a dish cloth or towel, which may be part of the gift, to boot!

You will need:
  • Your gift
  • A square piece of fabric (or whatever you are using to wrap) that is at least 3 times the length of the longest measurement of your gift


For my gift, I'll be wrapping up my latest embroidered piece, an anatomically correct brain (details here). It measures 7" in diameter, so I made sure my fabric was at least 21" long. For placement, start with your gift at least 1-2" away from the edges of your fabric's perimeter.


Flip the whole piece towards the other end of the fabric once.


..and again..


Flip once last time, you may have a few inches of fabric remaining at the end, so flipping it one last time is a wise idea. As you can see above, the "wrong" side of the fabric is facing up on your left and right side.


Take the fabric on the left and right side, and tie it into a knot, as you would tie your shoes.


Then, tie one last time. That's it!

This method of wrapping is great for just about anything -- books, soaps and perfumes, cooking utensils, boxed goods, and a heap more.

Saturday, December 14, 2013

Holiday Tutorials: Paper Snowflake Decoration


This is the last of our Holiday Tutorials, only 11 days until Christmas!

Today's DIY is Snowflake Art!  We had one wall that was looking sad and lonely in our living room, and these snowflakes are a nice addition to our Christmas decor :)

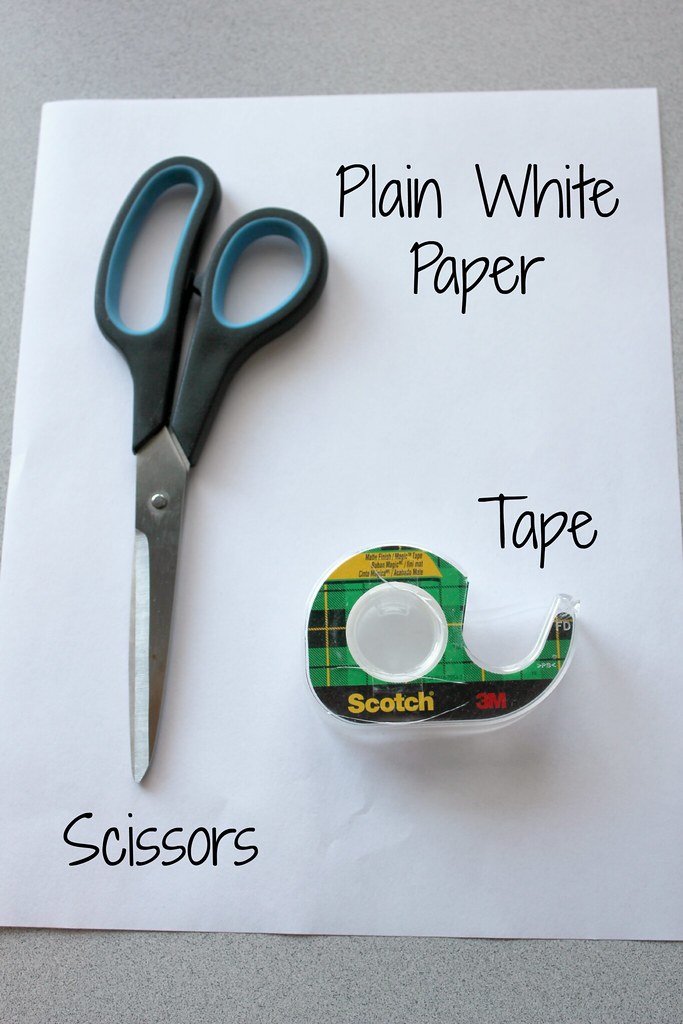
Here's what you need:


Here's what you do:
1. Fold the top corner to the opposite side of the paper (see photo)
2. Cut off excess paper, if you unfold it at this point you should have a perfect square.
3. Fold in a triangle again
4. Making sure the folded edge is on your left hand side, vertical, cut 3 lines starting from the bottom right corner. All the lines should reach the same point on the left, but make sure not to cut all the way through!


And then:
1. Once you've unfolded the square, bring the two middle pieces together to form a tube, and tape (or glue) together.
2. Flip the square over
3. Take the next layer out from the middle, and bring the pieces into a tube, tape together.
4. Flip the square over again and repeat
5. Flip the square over again and tape your final tube
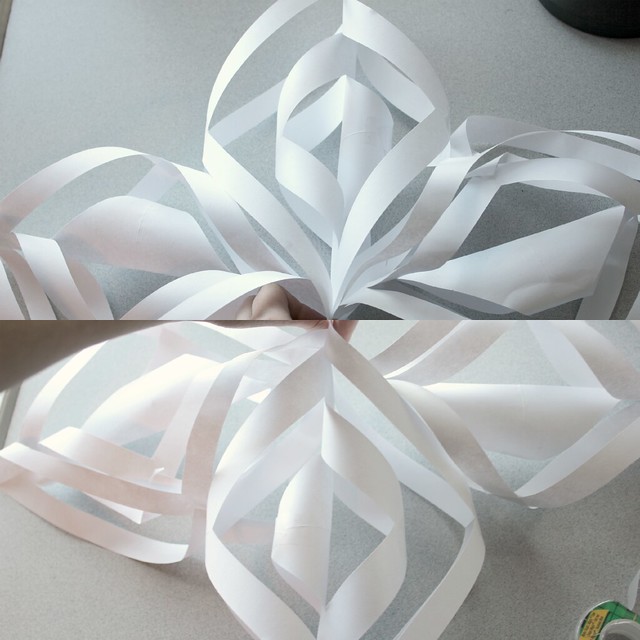
6. This is what the finished piece should look like. This is one piece, you will need 6 of these to create 1 whole snowflake. Don't worry, once you get the hang of it, it's quite simple :)


Once you have all 6 pieces, attach 3 pieces together (I used a stapler) at the ends. Do the same with the last three, and then grab both ends and staple both pieces together.


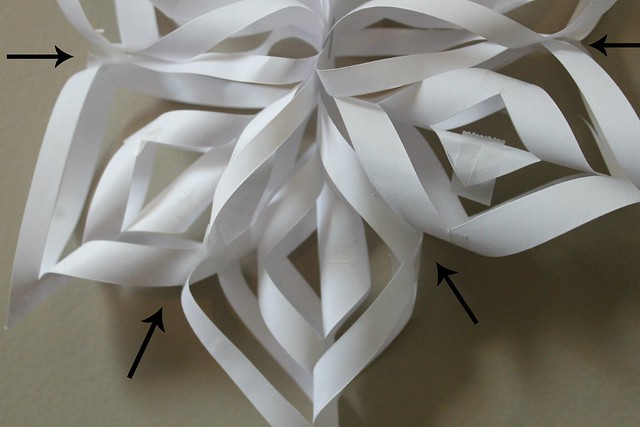
Now you'll want to tape (or glue) the edges together so that they don't hang funny (see arrows)


My inspiration for this wall art was from this trend you may have seen around, the 3D butterfly wall art. It's a neat way to add a pop to an empty wall.


We hope you've enjoyed our holiday tutorials, I hope they've inspired you to get a little crafty this holidays season!  Only a few more sleeps!

Tuesday, December 10, 2013

Holiday Tutorials: Felt and Fabric Tree Skirt


Today's DIY is a spin-off of this version of a scalloped Tree Skirt. I followed the same directions except I sewed fabric on top of the felt. 

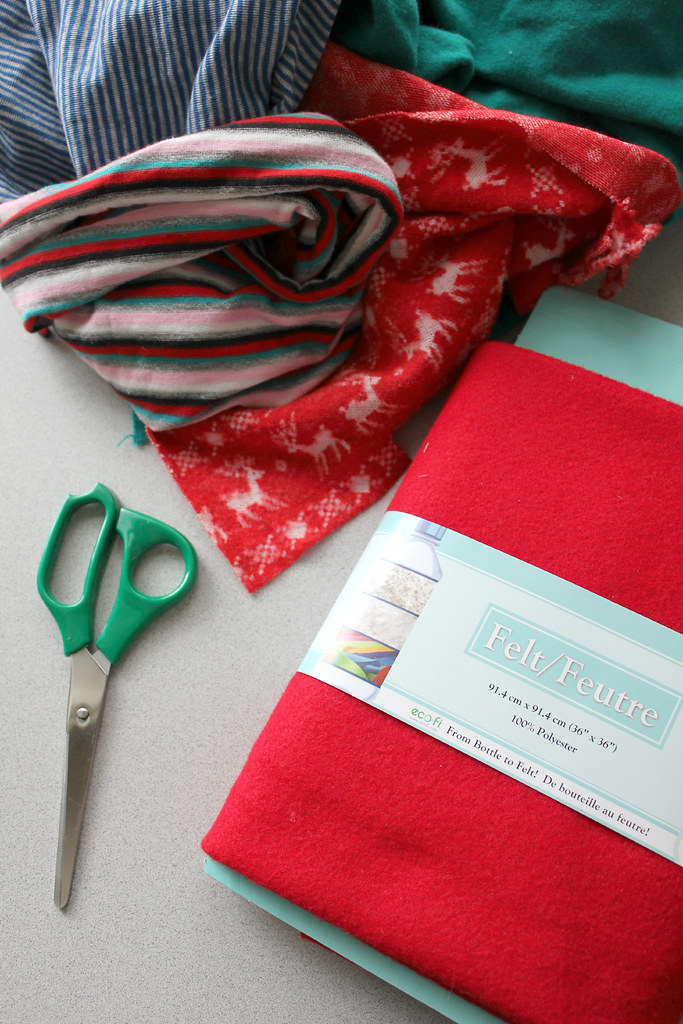
Here's what you need:
-The template from the Martha Stewart Website
-Enough felt to make 16 cutouts from the template (I bought mine at Walmart)
-A few varieties of patterned fabric and then some solids as well.


Here's what you do:
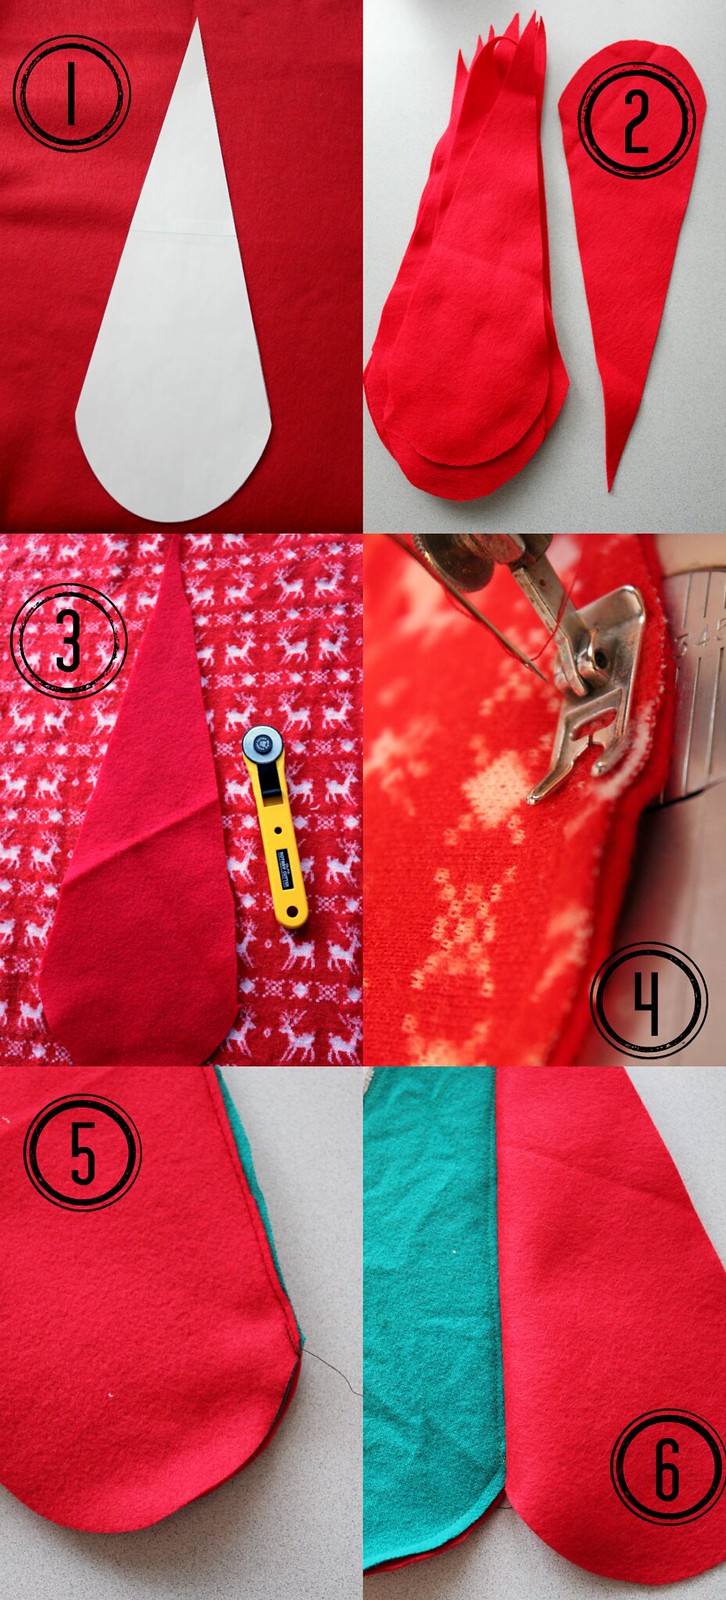
1. Place the paper template on the felt.
2. Cut out 16 of these
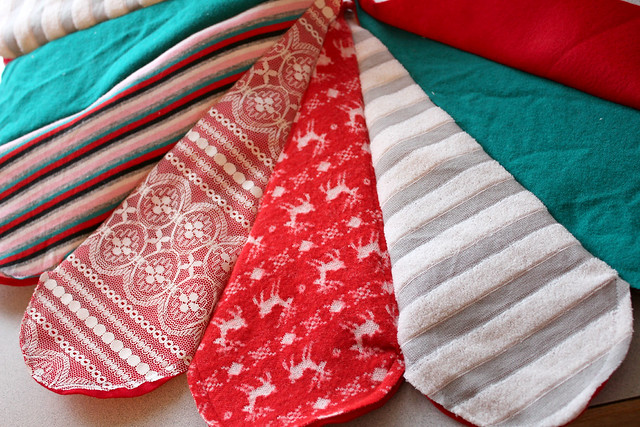
3. Cut out 16 pieces of fabric, as many of each pattern as you like
4. Sew the fabric on top of the felt pieces-it doesn't have to be perfect, because this is sort of a patchwork style it doesn't matter if it's not quite right :)
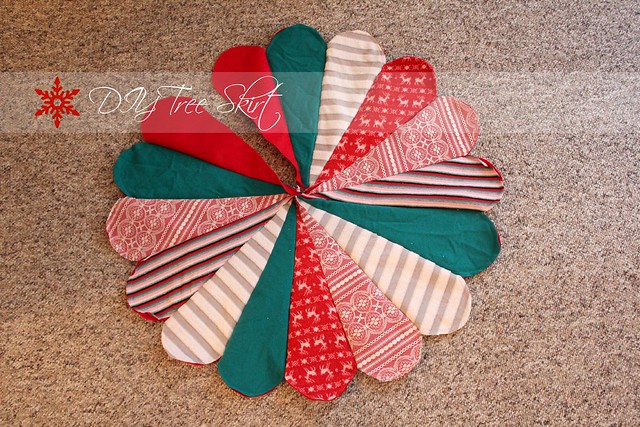
5. First put all your pieces next to each other until they form a circle. Then sew them together in pairs. In this picture I have two pieces face to face and I sewed them together up the edge, then when you open it up (6) you have sort of an upside down skinny heart shape.


7. Once you have all your pairs, start sewing them together, but leave about 2" unsewn at the tips because otherwise you will have a circle and you won't be able to wrap it around the tree!


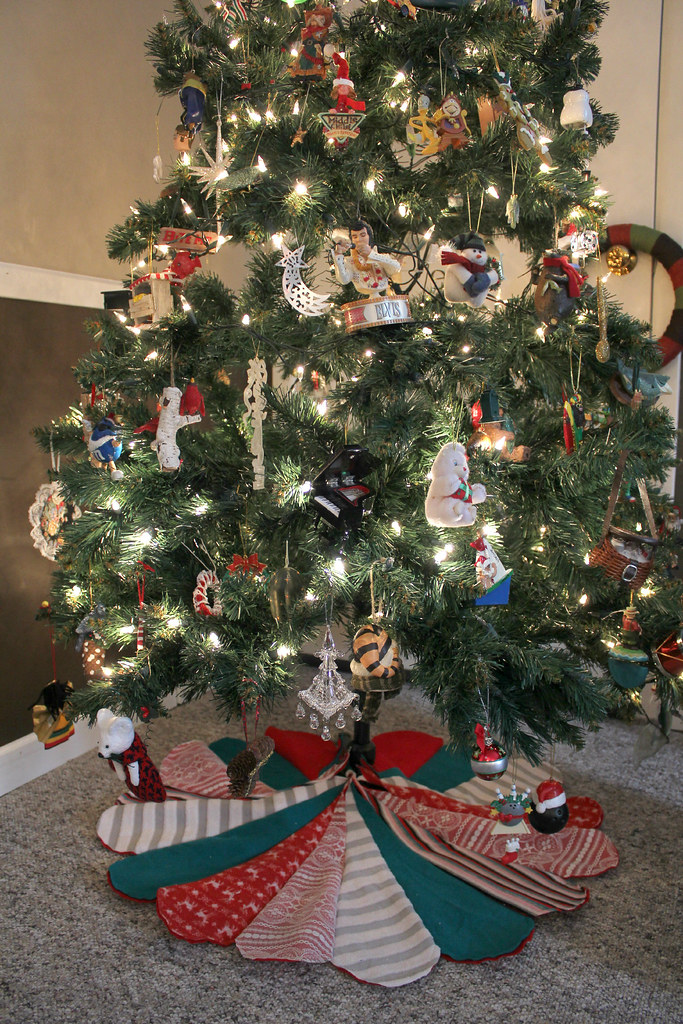
It's sorta smallish, so if you want a fuller one you can either make the wedges longer or you could do 2 and put another layer underneath and have it out wider.


Now the tree's all ready to welcome presents :)


Saturday, December 7, 2013

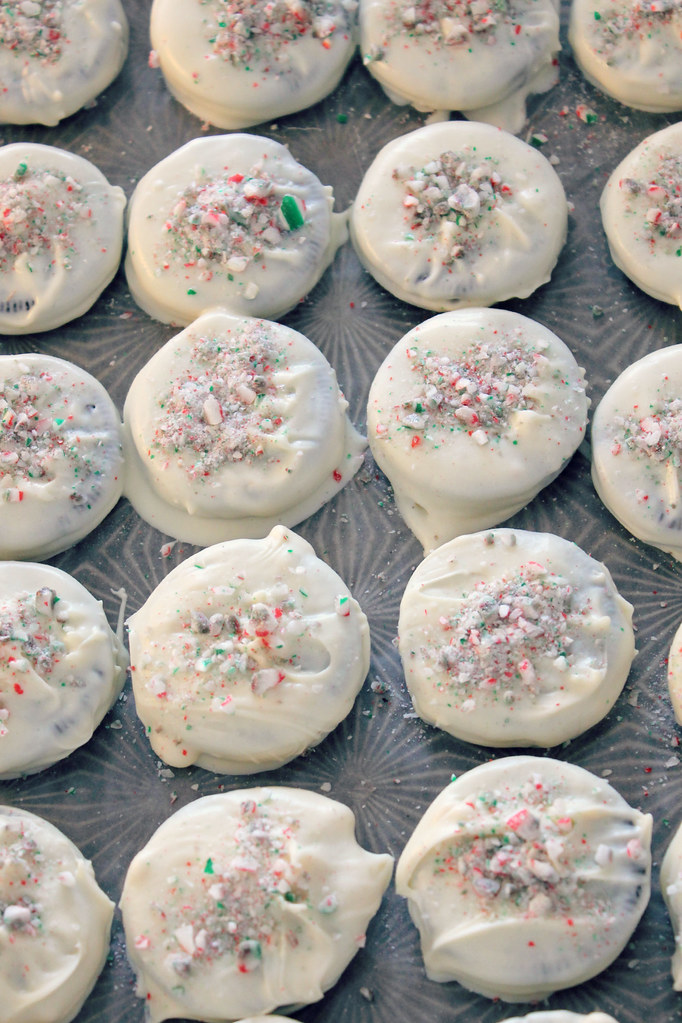
Holiday Tutorials: Candy Cane White Chocolate Oreos


I was so excited to make these--they taste just like Candy Cane bark, which is one of my favorites :)


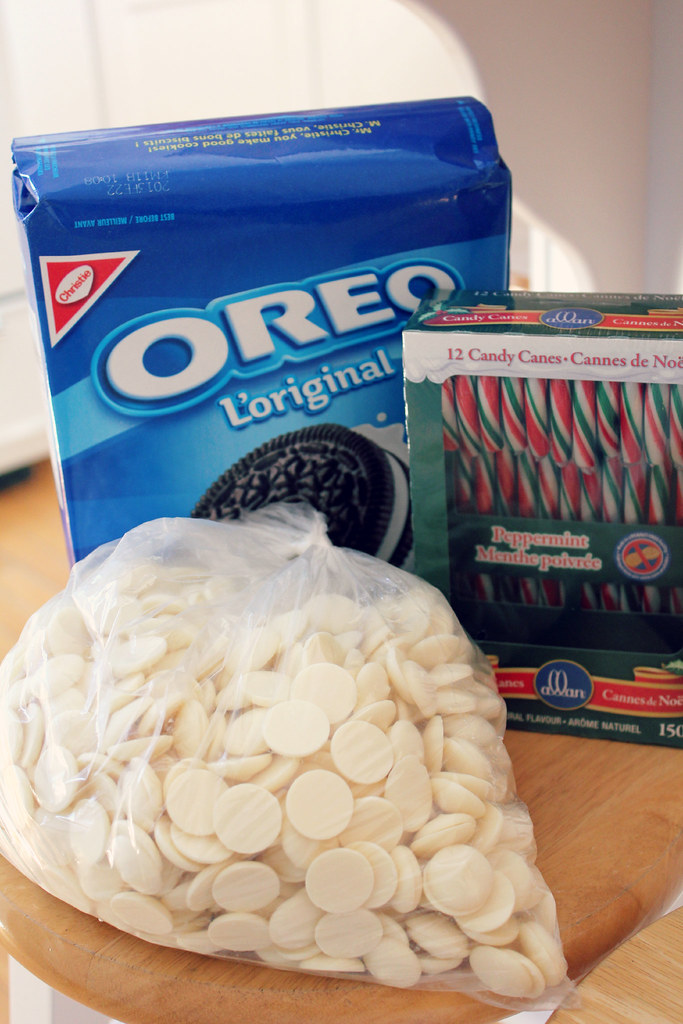
What you need:
- Box of Oreos (I bought the boxes that had 40 in them)
- A bag full of white chocolate melts (this amount made just over 2 boxes)
- Candy Canes!! (My FAVOURITE holiday treat!)
- A Cookie sheet lined with wax paper (To put the finished cookies on)


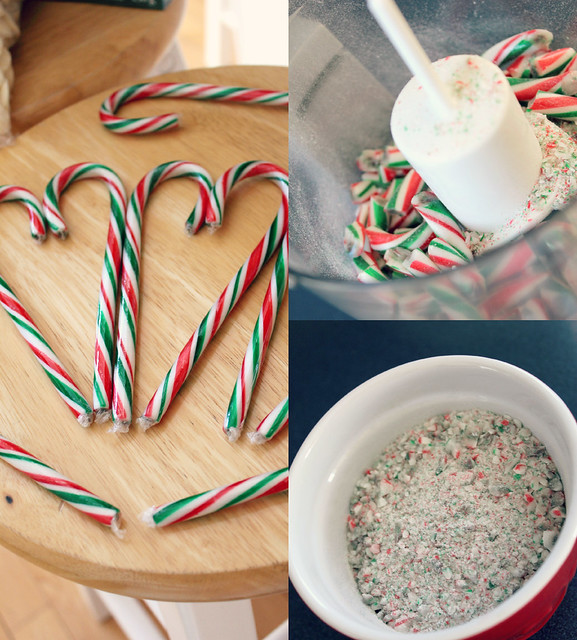
1. In a food processor, grind up the candy canes into chunks. If some of it turns into dust, that's okay. If you don't have a food processor, you can put the candy canes into a ziplock bag and pound away at them with a wooden spoon or...whatever works!


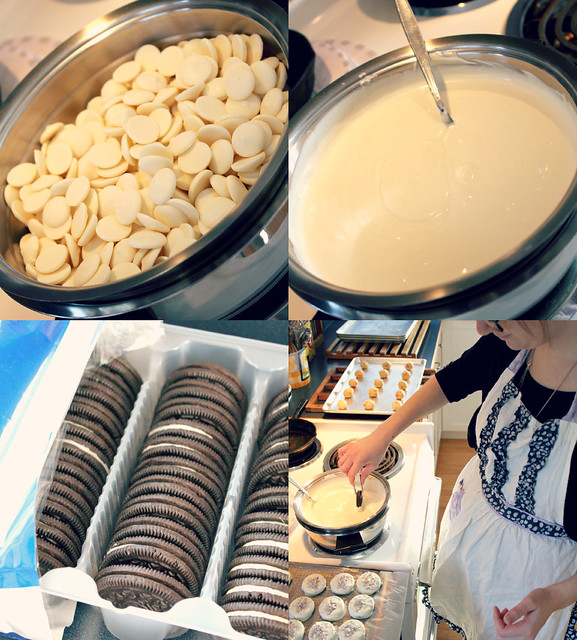
2. Put the white chocolate melts into a double boiler, and put on high heat until chocolate starts to melt. Once chocolate is melted, keep on low heat and make sure to keep it a consistent heat. I turned it up at one point and it got chunkier and harder to work with because I overdid it. It still tastes fine, but the cookie doesn't look as nice.


3. Once the chocolate is all melted, start dipping! I used tiny tongs with pointed edges, they worked really great! Make sure you get the Oreo completely covered in chocolate.
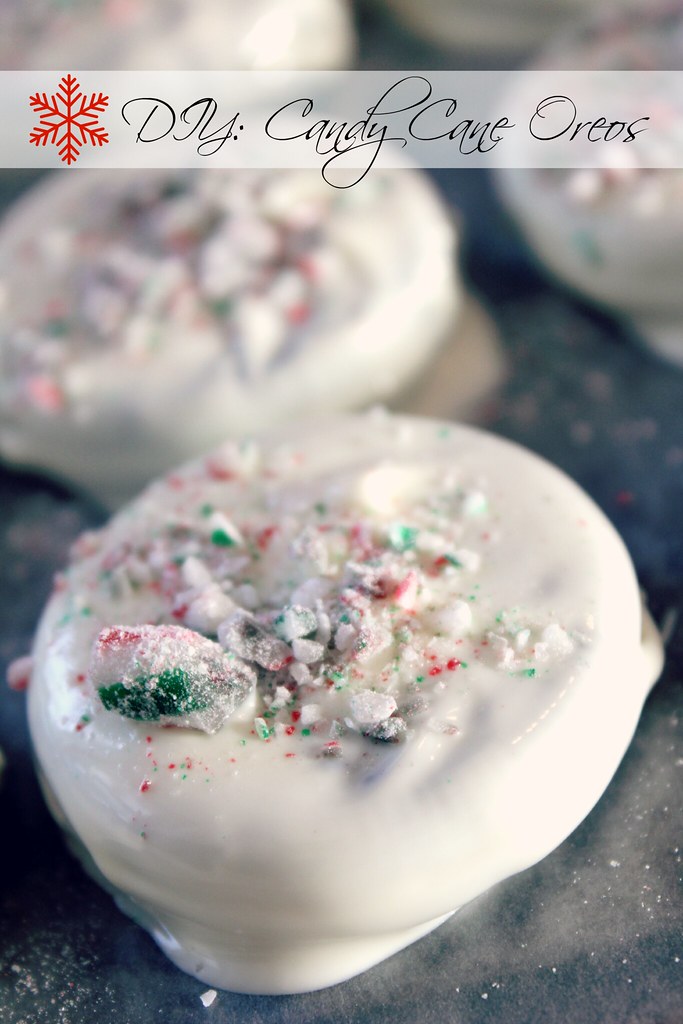
4. Place Oreos on wax paper lined cookie sheet, and sprinkle with candy cane bits


Since it's below 0°C here, I put the finished Oreos outside to harden, but you can definitely put them in the freezer just as well.


And there you have it: White chocolate dipped Candy Cane Oreos! Enjoy!


Tuesday, December 3, 2013

Holiday Tutorials: Fancy Forest Part 5


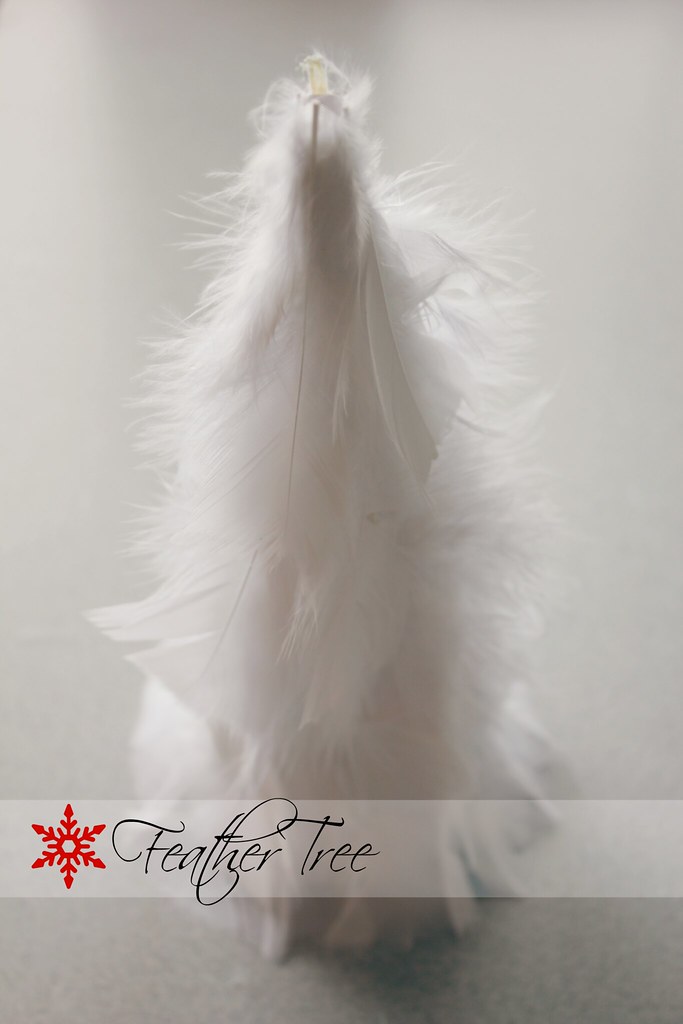
Hello everyone! Today's DIY is the last in our Fancy Forest- the Feather Tree.

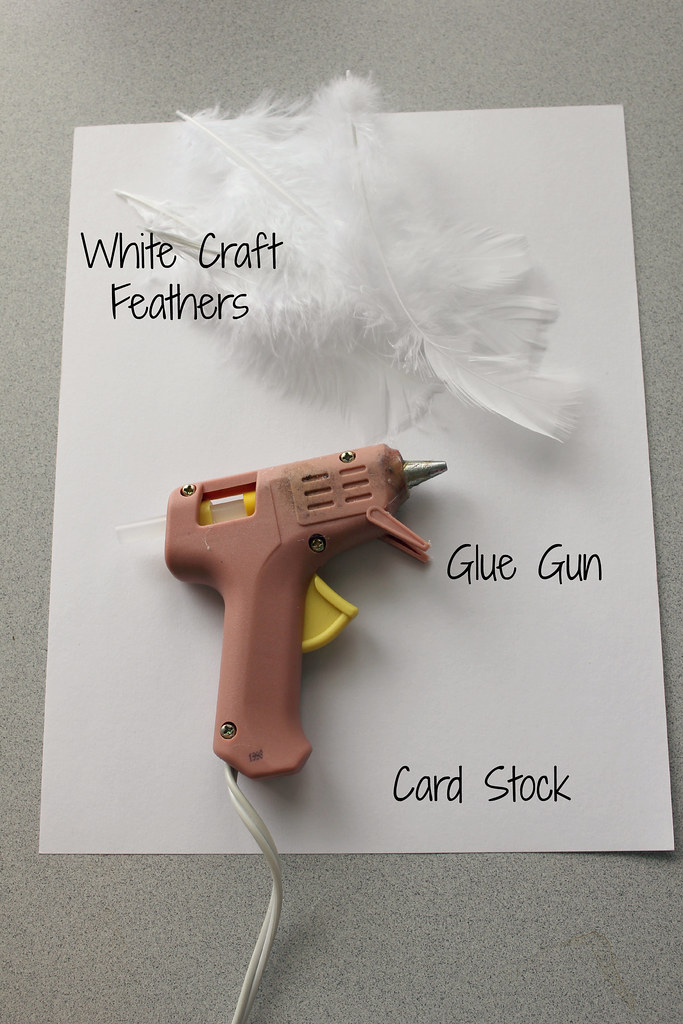
Here's what you need:


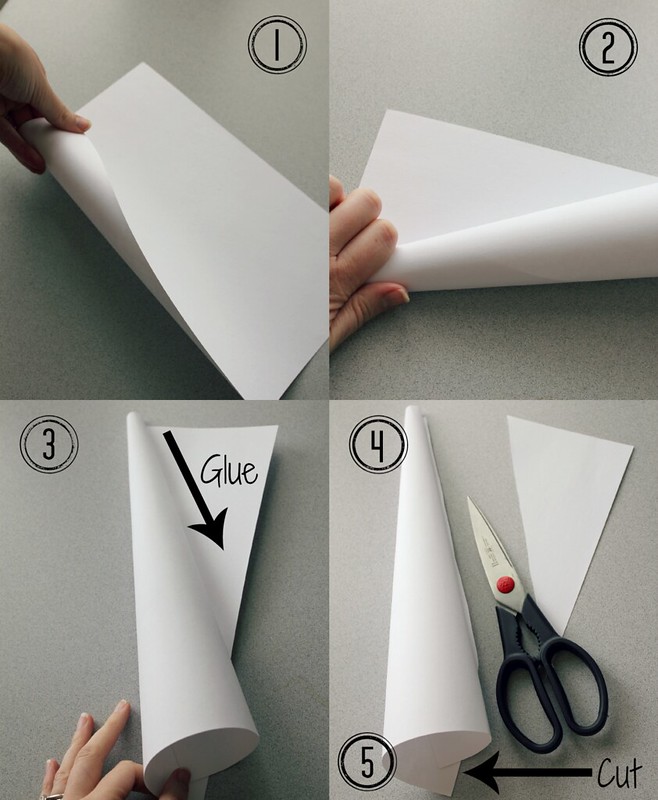
Start off with your cardstock tree base:
1. Start to curl the paper in at a corner
2. Make sure the top is tighter than the bottom, in a cone shape
3. Put a line of hot glue from top to bottom, roll into glue and hold until dry
4. Cut off excess paper, then do another line of glue from top to bottom to secure this seam
5. Cut off excess paper, making sure to cut it on an even surface so it stands properly. This will just be trial and error.


Instructions:
1. Cut 4 (or more depending on what you want) different lengths of feathers
2. Glue the largest feathers on first, one layer all the way around at about the same height. The ends of the feathers should brush the surface.
3. Continue gluing the different sizes in layers on top of each other until you reach the top.
4. Glue the topmost feathers down a bit to help create a tapered shape at the top.


And there you have the feather tree!


This completes our Fancy Forest! Check out the other tree DIY's here:
Sequin Tree
Lace Ruffle Tree
Petal Tree
Twine Tree
 

Saturday, November 30, 2013

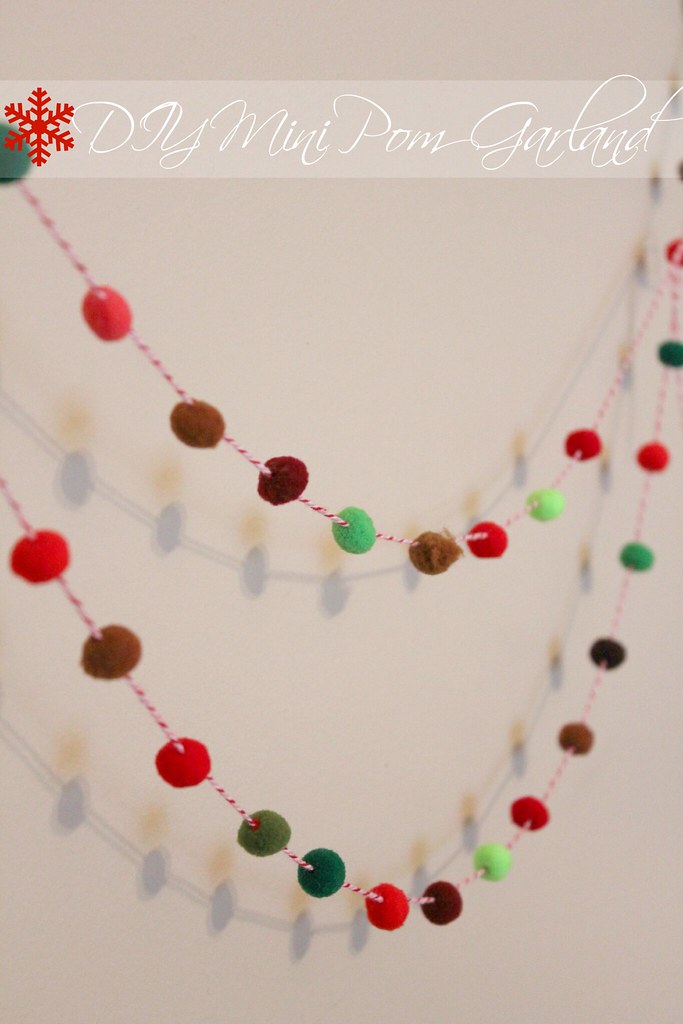
Holiday Tutorials: Mini Pom Garland


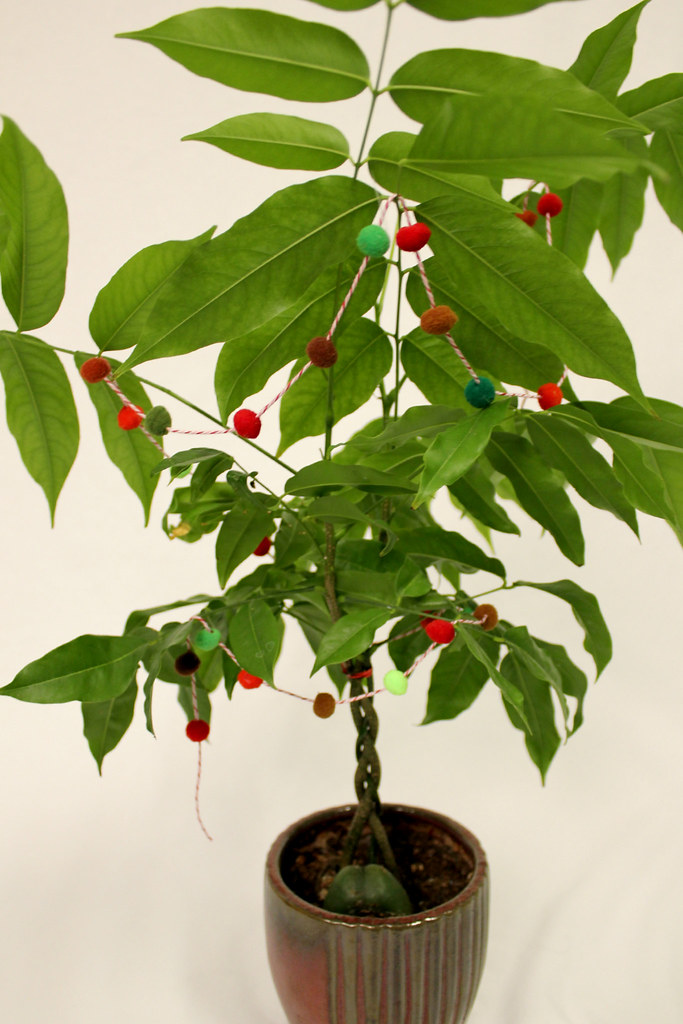
I had a lot of leftover mini pom poms from the Mistletoe, so today's DIY is this cute cute mini pom pom garland! It's super easy to make and it adds a little colour pop to your decorating!

Here's what you need:

- Colourful twine or string
- Mini pom poms (I found these at our local dollar store)
- Large sewing needle big enough to string the twine through


Instructions:
1. Thread the twine through needle
2. Push needle through middle of mini pom
3. Push pom poms down the string, space them as you wish!

Hang on your tree, on the wall, or even on your plants to give them a festive look!


Happy decorating!