

Hello everyone! Today's DIY is the last in our Fancy Forest- the Feather Tree.
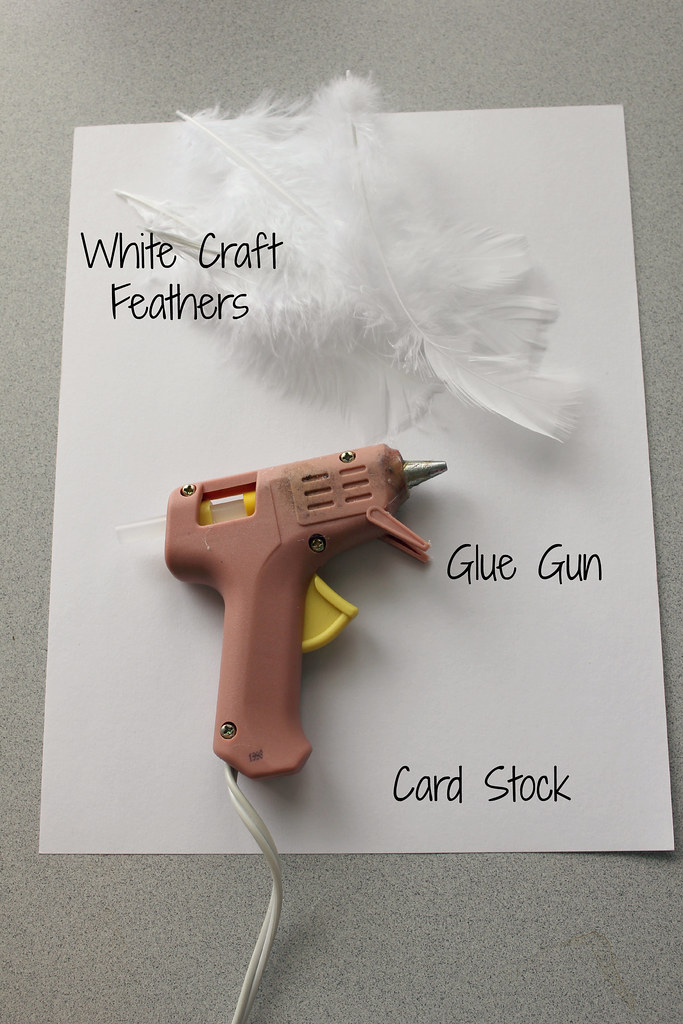
Here's what you need:
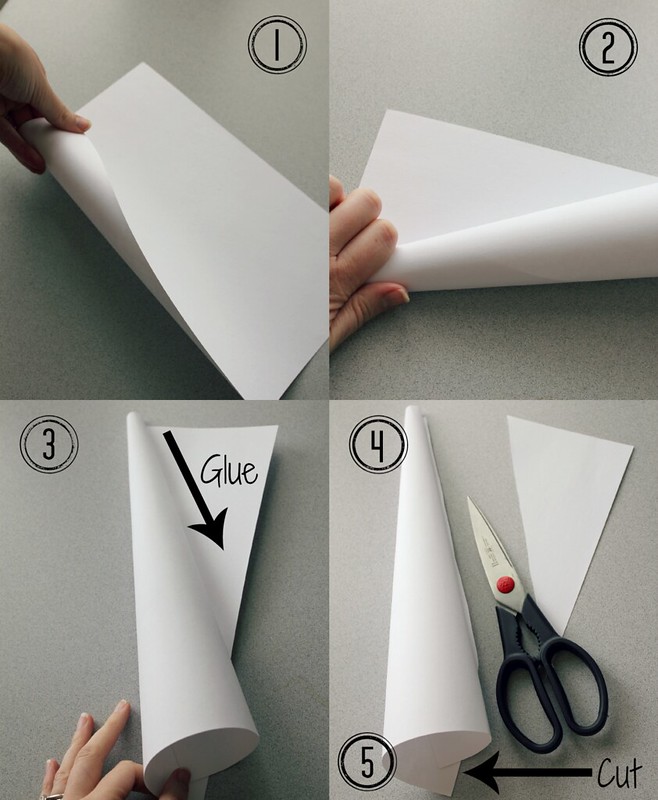
Start off with your cardstock tree base:
1. Start to curl the paper in at a corner
2. Make sure the top is tighter than the bottom, in a cone shape
3. Put a line of hot glue from top to bottom, roll into glue and hold until dry
4. Cut off excess paper, then do another line of glue from top to bottom to secure this seam
5. Cut off excess paper, making sure to cut it on an even surface so it stands properly. This will just be trial and error.
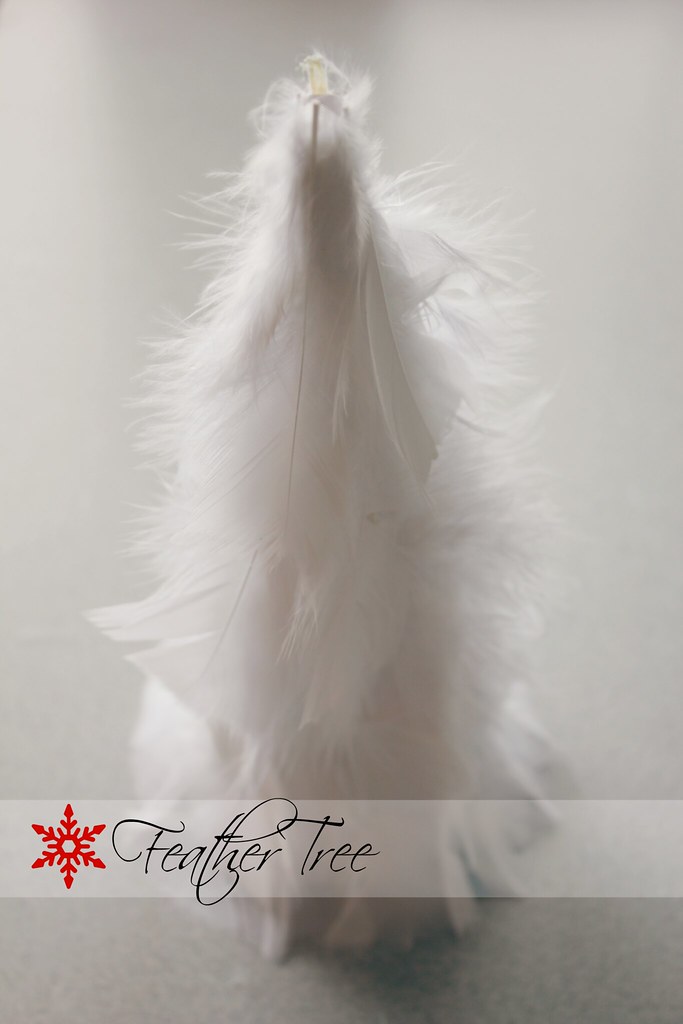
Instructions:
1. Cut 4 (or more depending on what you want) different lengths of feathers
2. Glue the largest feathers on first, one layer all the way around at about the same height. The ends of the feathers should brush the surface.
3. Continue gluing the different sizes in layers on top of each other until you reach the top.
4. Glue the topmost feathers down a bit to help create a tapered shape at the top.

And there you have the feather tree!
This completes our Fancy Forest! Check out the other tree DIY's here:
Sequin Tree
Lace Ruffle Tree
Petal Tree
Twine Tree

thank you so much Heidi for sharing! those are so lovely
ReplyDelete