Showing posts with label homemade. Show all posts

Friday, August 5, 2016

Foodie Friday : Homemade Salad Dressing for all that green goodness in the garden.

If you don't like the thought of buying mayonnaise or salad dressing that was made in a factory and filled with unpronouncable ingredients, this is a tried and true solution. July and August are when there is an abundance of salad fixings to buy at reasonable prices or even in your own garden. Today at my micro urban farm, I will be harvesting loads of swiss chard, spinach, kale, broccoli greens and beet greens. Time for salad!


This recipe is a family heirloom passed down through three generations. I never knew there was such a thing as mayonnaise until I was well into my 20's. For me this is what you put on potato salad, green salad and the best devilled eggs in the whole wide world!! That is, if you add a little bit of homegrown chives of course.


Grandma Snyder's Salad Dressing

Combine  4 tbsp. flour, 2 tsp salt, 2 tsp. dry mustard, 1 cup sugar in a deep saucepan.
Beat: 4 eggs, add 1 cup white vinegar, 1 cup water.  Add the liquid mixture to dry.

Cook over medium heat, stirring constantly until thick.  Add 1 tbsp. butter after cooking, more salt optional.
Leave to cool and place in a jar with a tight lid, keep refrigerated for up to a month.

Yum!


Tuesday, January 14, 2014

Tutorial: Mirror Makeover, DIY modern full length mirror to pretty up your closet

We've all got one: that hideous, but must have, full length mirror. It's useful--after all, a girl needs to see what she looks like - from head to toe - before heading out. I've had my cheapo walmart (forgive me) full length mirror for years, but I just decided that it needed an upgrade.


I started out with this cheaply framed full length mirror and a couple of pine boards.

The boards have some type of wax seal on the ends with the labels, so I got my step-dad to chop a little less than 1 cm from either end with his cut off saw before I began my project. I borrowed the sander (much quicker than doing it by hand). If you don't have one, beg and borrow! It'll make this so easy.

Using an old shower curtain as a drop cloth (recycle!), I sanded all four sides of the boards with 40 grit sand paper to open up the wood and get rid of any sap or residue so that it would take the stain better. It took about 10 minutes to do both boards and round out the corners. I changed to 120 grit sand paper to get rid of any roughness and did a quick pass on all sides of both boards. When you're sanding wood (especially with one of these electric thingy's) make sure you move with the grain of the wood. Never sand across the grain; this will leave fine scratches and ruin the look of your smooth wood.


Now for some stain. I had this dark wood stain from a previous project, but I would have chosen dark even if I had to buy some. The colour is called 'chocolate' because, y' know, there are so many natural wood species called chocolate...

Before staining, make sure to wipe down the wood with a rag (or a tack cloth if you have it) to get rid of any dust left behind from sanding.


I applied the stain with a foam brush. I prefer this method, because there is more control and virtually no drips, but you could easily do it with a regular paint brush or even an old rag. The stain that I used washed off hands pretty easily, but I used some latex gloves anyway.


Done. Now leave those to dry. In your garage or craft area... or laundry room of your apartment building... like me. Shh.. don't tell the landlord. ;)


In the mean time, I started preparing the mirror. I ripped off the paper backing and pushed off the top piece of moulding fairly easily. It's held together in the corners with some staple looking things. Then I started on the sides, and with a gentle push (I was worried about breaking the glass), the whole thing popped off. This took all of 10 seconds.


I cleaned the mirror with some glass cleaner and also used some rubbing alcohol to clean up the areas where I planned to adhere the tape.


This No More Nails mounting tape is pretty spectacular. Apparently a 15 cm length holds 5 Kg. I used the whole roll, just to be sure.... I cut 15 cm lengths and taped them down about 5 cm apart with my trusty ruler and scissors. I ran out, near the end of the second side, so I pulled off the last roll around the cardboard holder and did what I could to cover the last two spots. I'm not worried. 15 cm for 5 Kg, right?


Once the stain had dried completely, I lined up the wood, with the sides I wanted facing forward facing up, next to the mirror on the floor. I peeled off the red backing, and moved the wood over the tape and pressed. You should use a level, or some type of straight edge at the bottom (or top) to make sure that the wood will line up evenly. I also measured from the mirror bottom to the bottom of the first board and made sure that my straight edge was that exact distance (13") from the other side on the bottom. You cannot re-adjust the position as this will weaken the tape, so be sure before you set it.


It takes 24 hours for the tape to reach full strength, so I'm going to leave it face down on the floor (so the weight of the glass presses down on the wood) until tomorrow.

Voila! Shiny and new full length mirror. AND it's the right height to no longer cut my head off when I look in the mirror without having to hang or mount it on the wall.


Supplies and Cost:
full length mirror - on hand, so it cost me nothing
two pieces of wood longer than mirror - got mine at home depot for about $7
sand paper 40 or 60 grit, and 120 grit - on hand from my studio
wood stain - on hand from a previous project
foam paint brush - also had this from a previous project, you can get a bag of them for a few bucks from any craft supply or home improvement store
latex gloves - any home improvement store for a few bucks
no more nails mounting tape - home depot, about $6

So for less than $15, I've got a stylish and modern new full length mirror for the "dressing room." (I think that's what really rich people call the part of the bedroom where they dress). :)

What do you think? Will you tackle this project? If you do, we'd love to see your before and after photos. Leave your links in the comments below.

Tuesday, January 25, 2011

Homemade Marshmallows


Homemade marshmallows have been in vogue for the last couple of years, and it's no wonder why. These little candies are delicious and make impressive gifts. They are also surprisingly easy to make, and can be customized in so many ways. All in all, homemade marshmallows make a great Valentine's Day gift for neighbours and family - or yourself! And if you're not into Valentine's Day (like me), you could plop one into a nice cup of hot chocolate - it's the perfect cure for winter blahs.

Originally marshmallows were made from the root of the marshmallow plant and egg whites and sold as medicine. Nowadays marshmallows are a candy made by combining a cooked sugar syrup with gelatin. I followed the recipe at joyofbaking.com, but every marshmallow recipe follows approximately the same proportions. You can play around with the amount of sugar (some recipes call for only 1 1/2 cups, some for 2 cups) and corn syrup. Feel free to customize your marshmallows by replacing the vanilla extract with other flavourings, or even liqueur Just be aware that some flavours are stronger than others, so if you're going with something like peppermint or almond, reduce the amount of extract in the recipe to taste. If you're a vegetarian, you might want to try replacing the gelatin with agar agar flakes, or you could try out a traditional recipe made with real marshmallow root.

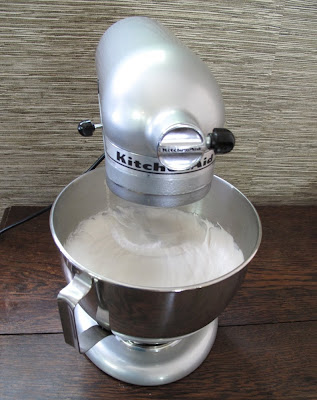
You'll definitely want to use a stand mixer fitted with the whisk attachment for this recipe.


Here is the basic recipe, generalized from many sources:

Ingredients
3 envelopes gelatin ( 2.5 Tbsp or 12 sheets)
1/2 cup cold water

2 cups sugar
1 cup light corn syrup
1/2 cup water
1/8 - 1/4 tsp salt

2 tsp vanilla, or the flavouring of choice
food colouring, if desired

plenty of confectioner's sugar for dusting

Method
-Grease a 9 x 13" pan, and line with parchment paper. Dust heavily with confectioner's sugar.

-Put gelatin and cold water in your mixing bowl. Let stand to soften.


-Make the sugar syrup. In a medium sauce pan, stir together the sugar, corn syrup, salt and water. Wash down sides of the pan with a wet pastry brush. Clip on a candy thermometer, and cook the mixture until it reaches 220F (soft ball stage). Take the pan off heat immediately.


-With mixer on low speed, slowly pour the syrup into the softened gelatin. Increase speed to high, and beat mixture until it is thick, white and fluffy. This will take between 5 and 15 minutes. Add vanilla (or other flavouring) and food colouring, if using, and beat for another 30 seconds to one minute more.


-Scrape the mixture into the prepared pan, using a dampened rubber spatula. The mixture will be extremely sticky, so just do your best here. Generously sprinkle the top with confectioner's sugar. Let stand, uncovered at room temperature for 6 - 12 hours, depending on humidity.


-Generously dust a cutting board with confectioner's sugar. To remove marshmallows from pan, cut around the edges of the pan with a sharp knife. Either turn the pan over onto your prepared cutting board, or pull the entire marshmallow out if that works better for you. Peel off the parchment paper, and cover with confectioner's sugar. Cut the marshmallow slab into desired shapes, with a sharp knife or cookie cutter. The marshmallows will be very sticky, and you'll probably have to stop and clean your knife several times. Keep the marshmallows small as they are very sweet and rich. A little goes a long way!


-Decorate as desired. The cut edges will be extremely sticky and need to be coated with something to keep them in tact and moist. There are no limits here! Simple ideas include confectioner's sugar, toasted coconut, cocoa powder.

Store marshmallows in a parchment lined container at room temperature. Marshmallows will keep for at least a week or two, depending on humidity.


These would look so cute in tiny packages, wrapped up with brown paper and pretty ribbon! Your friends and neighbours will love you!