Showing posts with label valentines day. Show all posts

Sunday, February 1, 2015

Shout out : Smash Knits' 14 Days of Love Giveaway!


As a way to celebrate love and the art of handicrafts, Ashlee of Smash Knits has paired up with 13 other artisans to give back to the community that supports us, showcase some new pieces, and have some fun in celebration of all things Valentine's Day.


"For the next 14 days I will be hosting giveaways on my Facebook page; items that have been created and donated by some of Winnipeg's amazing talent!

The lineup is as follows:

1 - Ashlee of Smash Knits 2 - Andrea and Christie of Baby in Stitches 3 - Jody of Creative Authority 4 - Mandy of Over the Rainbow 5 - Wendy of Felt Loved 6 - Andee of Sew Dandee 7 - Courtney of iHooked 8 - Emma of Emma's Doll Party 9 - Melanie of New Fangled 10 - Lisa of The Park River Co. 11 - Marissa of Peridot Designs 12 - Ashley of Country Stitched 13 - Ashley of Chunky Knitz 14 - Kaitlyn & Mark of Wood n Knots 


I am kicking off the giveaway bright and early this morning
 with an Olive You pillow, and a Mum n Me headwrap and beanie combo. Winners are drawn at random, and will be announced daily."

Head to Ashlee's Facebook page to participate!

Tuesday, January 10, 2012

W.E.S.T. January Design Challenge: The Colour of Love

Just in time for thinking ahead to that celebration of love day in February, our theme for this month is "The Colour of Love." Show us what colour you think of when you think of LOVE! What designs are inspired by thoughts of love?

Love Lies Here by our fearless team leader, PeriwinkleDzyns

Do you think of the traditional red or pink? Rainbows? Hearts and flowers? Or a mix of the unexpected?

Coffee Press Cozy by flytimes

Show us all of your romantic creations, your wild and crazy ideas, your heartbreaks and sorrows--anything goes! The deadline for submissions for this design challenge is February 10.

And a quick review of how to play along: 
Think about the inspiration topic posted on the blog and in the team forum. As you mull over what that particular idea means to you, jot down some notes in the discussion thread or leave a comment on the blog. Take pictures of your process and finished item and post them in the forum thread. We would love to hear the story behind how you arrived at your finished creation! I will post a round up of all entries at the end of the challenge . 

A few notes: 

Create something new, especially for the challenge. Entries for each challenge must be finished by the posted deadline. Vintage and supply sellers are welcome to participate too, with a focus on artful photography and careful choice of item. 

Happy designing! 

Tuesday, February 1, 2011

Tutorial Tuesday: Boy Cut Panties


Today I thought I would share a Valentine's Day related tutorial with all of your marvelous readers.

Who doesn't need a cute pair of underwear? And for some reason, men go super ga-ga over this style of panty.

Do you want them? I've already sold these ones, but I can show you how to make your own. Yay!

Supplies needed:

- Downloadable pattern
- half a yard of cotton knit (this will make two pairs) You can also use old t-shirts ( I used an extra large t-shirt to make the ones pictures above.
- half inch elastic (enough to fit comfortably around your hips
- matching thread
- ribbon or any other fun thing to decorate them with (optional)

1) Cutting out the pattern

The pattern for medium size is available using the links below:

If you need a size other than medium, you can up or downsize from this pattern

- cut out one front
- cut out one back
- cut out one crotch piece (included on the boycutfront.pdf)


2) Finish the seams
- Because you're working with knit, it won't fray, but I like to finish some of the seams just for appearance sake. Use a zigzag to finish the short ends of the crotch piece.
- I set my machine to zigzag for the entire process in fact. It's much nicer to sew a zigzag on knit fabric. This allows the knit to stretch properly and since underwear undergoes a lot of stress, zigzag is best!

3) Attach the pieces

- Sew the front and back (right sides together) at the crotch seam.
- Place the crotch piece (wrong sides together) centered in between the front and back pieces. Fold the leg seams down twice to make a hem. Pin and then stitch. This should secure the crotch piece in properly. If it doesn't quite fit, it's knit, it'll stretch!

4) Side Seams and Top Casing
- fold your front and back pieces so that the side seams are matched (right sides together). Stitch side seams.
- Fold down your top casing 1/4 of an inch and press. Then fold down another inch to form a casing. Stitch around the edge making sure to leave a few inches open to insert the elastic.

5) Insert Elastic and Decorate
- you might want to try on your pair of boy cuts in order to get an accurate measurement. Since I'm making these to stock in my shop, I measured my own hips. Remember that these panties fit low (around the hips) when measuring.
- insert elastic into casing using safety pins. Sew elastic together and then sew the casing opening shut.
- Decorate however you like!

Aren't those cute? Making your own underwear is really less painful than you think! I thought I'd start you out with something easy to show you that it really isn't difficult to have your own one of a kind underwear.

But if you're still a little unsure, you can purchase these psychedelic purple ones or these ones with construction trucks on them at Tawny Bee.

You may use this pattern to make underwear for yourself, your friends, your lovers, whoever you like. You may also use this pattern to make underwear to sell. All I ask is that you give pattern creation credit to Tawny Bee in your product listing.

_____

This tutorial originally appeared on The LT Experience on June 3, 2010

If you would like to see the regular cut panties tutorial, leave a comment below and I'll include it in a future WEST tutorial Tuesday. :)

Cheers and Happy Tuesday!

- Tawny

Tuesday, January 25, 2011

Homemade Marshmallows


Homemade marshmallows have been in vogue for the last couple of years, and it's no wonder why. These little candies are delicious and make impressive gifts. They are also surprisingly easy to make, and can be customized in so many ways. All in all, homemade marshmallows make a great Valentine's Day gift for neighbours and family - or yourself! And if you're not into Valentine's Day (like me), you could plop one into a nice cup of hot chocolate - it's the perfect cure for winter blahs.

Originally marshmallows were made from the root of the marshmallow plant and egg whites and sold as medicine. Nowadays marshmallows are a candy made by combining a cooked sugar syrup with gelatin. I followed the recipe at joyofbaking.com, but every marshmallow recipe follows approximately the same proportions. You can play around with the amount of sugar (some recipes call for only 1 1/2 cups, some for 2 cups) and corn syrup. Feel free to customize your marshmallows by replacing the vanilla extract with other flavourings, or even liqueur Just be aware that some flavours are stronger than others, so if you're going with something like peppermint or almond, reduce the amount of extract in the recipe to taste. If you're a vegetarian, you might want to try replacing the gelatin with agar agar flakes, or you could try out a traditional recipe made with real marshmallow root.

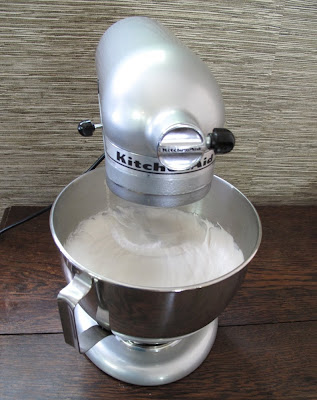
You'll definitely want to use a stand mixer fitted with the whisk attachment for this recipe.


Here is the basic recipe, generalized from many sources:

Ingredients
3 envelopes gelatin ( 2.5 Tbsp or 12 sheets)
1/2 cup cold water

2 cups sugar
1 cup light corn syrup
1/2 cup water
1/8 - 1/4 tsp salt

2 tsp vanilla, or the flavouring of choice
food colouring, if desired

plenty of confectioner's sugar for dusting

Method
-Grease a 9 x 13" pan, and line with parchment paper. Dust heavily with confectioner's sugar.

-Put gelatin and cold water in your mixing bowl. Let stand to soften.


-Make the sugar syrup. In a medium sauce pan, stir together the sugar, corn syrup, salt and water. Wash down sides of the pan with a wet pastry brush. Clip on a candy thermometer, and cook the mixture until it reaches 220F (soft ball stage). Take the pan off heat immediately.


-With mixer on low speed, slowly pour the syrup into the softened gelatin. Increase speed to high, and beat mixture until it is thick, white and fluffy. This will take between 5 and 15 minutes. Add vanilla (or other flavouring) and food colouring, if using, and beat for another 30 seconds to one minute more.


-Scrape the mixture into the prepared pan, using a dampened rubber spatula. The mixture will be extremely sticky, so just do your best here. Generously sprinkle the top with confectioner's sugar. Let stand, uncovered at room temperature for 6 - 12 hours, depending on humidity.


-Generously dust a cutting board with confectioner's sugar. To remove marshmallows from pan, cut around the edges of the pan with a sharp knife. Either turn the pan over onto your prepared cutting board, or pull the entire marshmallow out if that works better for you. Peel off the parchment paper, and cover with confectioner's sugar. Cut the marshmallow slab into desired shapes, with a sharp knife or cookie cutter. The marshmallows will be very sticky, and you'll probably have to stop and clean your knife several times. Keep the marshmallows small as they are very sweet and rich. A little goes a long way!


-Decorate as desired. The cut edges will be extremely sticky and need to be coated with something to keep them in tact and moist. There are no limits here! Simple ideas include confectioner's sugar, toasted coconut, cocoa powder.

Store marshmallows in a parchment lined container at room temperature. Marshmallows will keep for at least a week or two, depending on humidity.


These would look so cute in tiny packages, wrapped up with brown paper and pretty ribbon! Your friends and neighbours will love you!