Showing posts with label gift. Show all posts

Wednesday, July 6, 2016

WESTie Wednesday : ft Imagine Yarn!

WESTie Wednesday with Anel of Imagine Yarn!


Welcome to WESTie Wednesday, where each week we get to know a proud WEST member and their Etsy shop! Learn about Anel and her shop Imagine Yarn.


"At Imagine YarnI sell two different lines. I sell crochet and felt completed purses which range in sizes. I love making these and they make great gifts. I have also put together kits to make the purses. The kits for the felted purses include a pattern I wrote with clear directions, the metal purse frame and 100% unwashed wool from Norway. I also have a makeup bag purse kit that includes a pattern I wrote, metal purse frame and 100% cotton. One of my favourite purses is the Miss Daisy. The kit includes a pattern written by a South African designer friend, South African 100% cotton or merino wool and a purse metal frame. The Miss Daisy purse includes a lovely quote that a friend helped me write.


I am originally from South Africa, a country with lovely cotton and merino wool. I believe crochet and knitting are moving in a very exciting new direction. Handmade crochet items are more modern with a lovely old world charm. This process is what inspired me to start my shop.


All we need is imagination to give free range to our creativity and create something beautiful. I look for new hardware to incorporate into crochet items. My focus is purses. A lot of my yarn is hand dyed in South Africa, both 100% cotton and 100% merino. I love their yarn. I also have South African artisan handcraft wooden crochet hooks for the shop. I put the kits together and create some completed purses in my home in-between my day job.


We asked Anel “Why Etsy?

"My friends and family were encouraging me to sell the lovely purses I made for them, so I thought I would give this a try."


Want to see more? Be sure to check out Imagine Yarn on social media:

Wednesday, July 15, 2015

WESTie Wednesday with Deanne of Little Feather Designs

Welcome to WESTie Wednesday, where each week we get to know a proud WEST member and their Etsy shop! Learn about Deanne and her Etsy shop Little Feather Designs!

"I am a wife to a hardworking man, nature warrior, mother of 2 wild boys, dog owner, sister to 5, friend to gypsy souls." 

https://www.etsy.com/ca/shop/LittleFeatherDesigns

"In my etsy shop you will find a range of safe wood teethers, organic bibdanas, headbands and slouchy toques. I mainly make for little people ranging from newborn up to 6 to 8 years of age. I am slowly spreading my wings and branching out into clothing that will consist of shorts, harems, leggings, sweaters, tshirts and more. I also take on custom orders that have consisted of crayon rolls all the way up to handmade quilts."

 Source )

 "I started my shop a few years ago when I was expecting my first baby. I wanted to make him everything but soon realized that costs a lot of money. Along with sewing for my boys came the making for others. I enjoy giving handmade gifts that have been blessed with love. The requests came in and after seeing the quality of goods out there in the stores Little Feather Designs was born. Most of my pieces were spurred as the needs of my family and surrounding family grew. Trendy bibs, safe teethers, cool reversible toques, headbands and now organic leggings, harems and soon more."

 ( Source )

"Most if not all of my materials are American or Canadian made. I refrain as much as possible to take the cheap road and purchase from overseas and encourage the making of poor quality goods and even poorer working conditions. I use organic whenever and wherever I can. I want parents to feel secure knowing that the pieces they are purchasing from me are safe for their babes to use and wear."

 ( Source )

"All of my pieces are made in my home using machines that were once my mothers prized possessions. I create in a space that is filled with the loudness of boys and the beauty of the woods. I take time preparing and making my products. By the time a piece is sent out a piece of me goes with it."


"I love to create in any way shape or form. I live out in wilds of the Canadian Shield in a home that my husband and I built with the help of friends and family. My love of nature and the great outdoors comes through in my products. I love warm natural colors and try to work with as much organic renewable fibers as possible."
  
Want to see more? Be sure to check out Deanne on social media!

Saturday, December 20, 2014

skip the gift wrap with Caitlin / Real Swanky!


This Tutorial Tuesday, Caitlin of Real Swanky will be showing us how to wrap gifts without the use of paper! It's a great way to utilize your..
  • spare fabric
  • a bandanna
  • a cute vintage handkerchief
  • a dish cloth or towel, which may be part of the gift, to boot!

You will need:
  • Your gift
  • A square piece of fabric (or whatever you are using to wrap) that is at least 3 times the length of the longest measurement of your gift


For my gift, I'll be wrapping up my latest embroidered piece, an anatomically correct brain (details here). It measures 7" in diameter, so I made sure my fabric was at least 21" long. For placement, start with your gift at least 1-2" away from the edges of your fabric's perimeter.


Flip the whole piece towards the other end of the fabric once.


..and again..


Flip once last time, you may have a few inches of fabric remaining at the end, so flipping it one last time is a wise idea. As you can see above, the "wrong" side of the fabric is facing up on your left and right side.


Take the fabric on the left and right side, and tie it into a knot, as you would tie your shoes.


Then, tie one last time. That's it!

This method of wrapping is great for just about anything -- books, soaps and perfumes, cooking utensils, boxed goods, and a heap more.

Tuesday, January 25, 2011

Homemade Marshmallows


Homemade marshmallows have been in vogue for the last couple of years, and it's no wonder why. These little candies are delicious and make impressive gifts. They are also surprisingly easy to make, and can be customized in so many ways. All in all, homemade marshmallows make a great Valentine's Day gift for neighbours and family - or yourself! And if you're not into Valentine's Day (like me), you could plop one into a nice cup of hot chocolate - it's the perfect cure for winter blahs.

Originally marshmallows were made from the root of the marshmallow plant and egg whites and sold as medicine. Nowadays marshmallows are a candy made by combining a cooked sugar syrup with gelatin. I followed the recipe at joyofbaking.com, but every marshmallow recipe follows approximately the same proportions. You can play around with the amount of sugar (some recipes call for only 1 1/2 cups, some for 2 cups) and corn syrup. Feel free to customize your marshmallows by replacing the vanilla extract with other flavourings, or even liqueur Just be aware that some flavours are stronger than others, so if you're going with something like peppermint or almond, reduce the amount of extract in the recipe to taste. If you're a vegetarian, you might want to try replacing the gelatin with agar agar flakes, or you could try out a traditional recipe made with real marshmallow root.

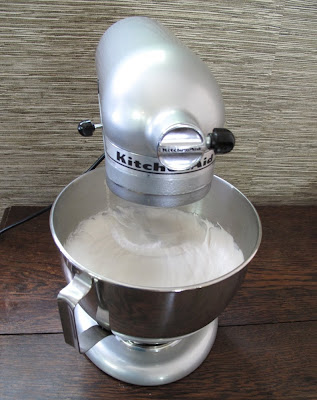
You'll definitely want to use a stand mixer fitted with the whisk attachment for this recipe.


Here is the basic recipe, generalized from many sources:

Ingredients
3 envelopes gelatin ( 2.5 Tbsp or 12 sheets)
1/2 cup cold water

2 cups sugar
1 cup light corn syrup
1/2 cup water
1/8 - 1/4 tsp salt

2 tsp vanilla, or the flavouring of choice
food colouring, if desired

plenty of confectioner's sugar for dusting

Method
-Grease a 9 x 13" pan, and line with parchment paper. Dust heavily with confectioner's sugar.

-Put gelatin and cold water in your mixing bowl. Let stand to soften.


-Make the sugar syrup. In a medium sauce pan, stir together the sugar, corn syrup, salt and water. Wash down sides of the pan with a wet pastry brush. Clip on a candy thermometer, and cook the mixture until it reaches 220F (soft ball stage). Take the pan off heat immediately.


-With mixer on low speed, slowly pour the syrup into the softened gelatin. Increase speed to high, and beat mixture until it is thick, white and fluffy. This will take between 5 and 15 minutes. Add vanilla (or other flavouring) and food colouring, if using, and beat for another 30 seconds to one minute more.


-Scrape the mixture into the prepared pan, using a dampened rubber spatula. The mixture will be extremely sticky, so just do your best here. Generously sprinkle the top with confectioner's sugar. Let stand, uncovered at room temperature for 6 - 12 hours, depending on humidity.


-Generously dust a cutting board with confectioner's sugar. To remove marshmallows from pan, cut around the edges of the pan with a sharp knife. Either turn the pan over onto your prepared cutting board, or pull the entire marshmallow out if that works better for you. Peel off the parchment paper, and cover with confectioner's sugar. Cut the marshmallow slab into desired shapes, with a sharp knife or cookie cutter. The marshmallows will be very sticky, and you'll probably have to stop and clean your knife several times. Keep the marshmallows small as they are very sweet and rich. A little goes a long way!


-Decorate as desired. The cut edges will be extremely sticky and need to be coated with something to keep them in tact and moist. There are no limits here! Simple ideas include confectioner's sugar, toasted coconut, cocoa powder.

Store marshmallows in a parchment lined container at room temperature. Marshmallows will keep for at least a week or two, depending on humidity.


These would look so cute in tiny packages, wrapped up with brown paper and pretty ribbon! Your friends and neighbours will love you!