Showing posts with label TawnyBee. Show all posts

Wednesday, December 24, 2014

WESTie Wednesday - featuring Tawny Bee

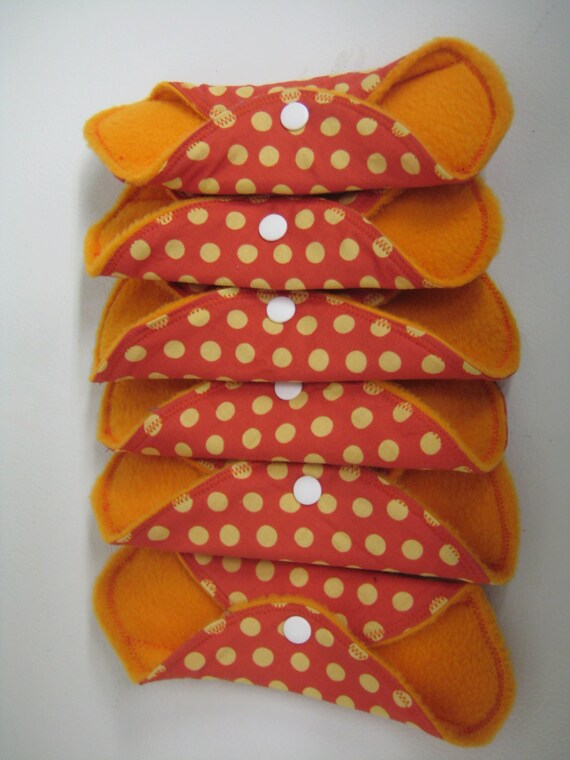
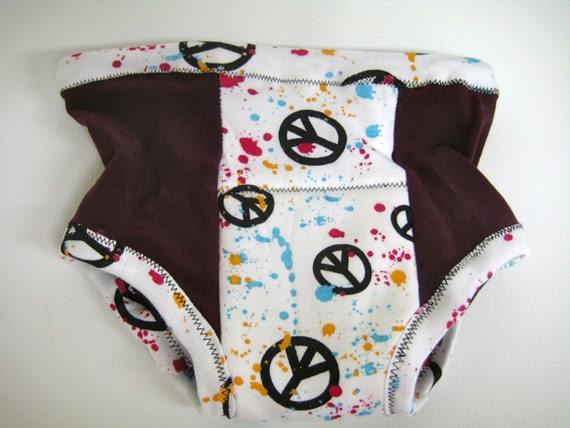
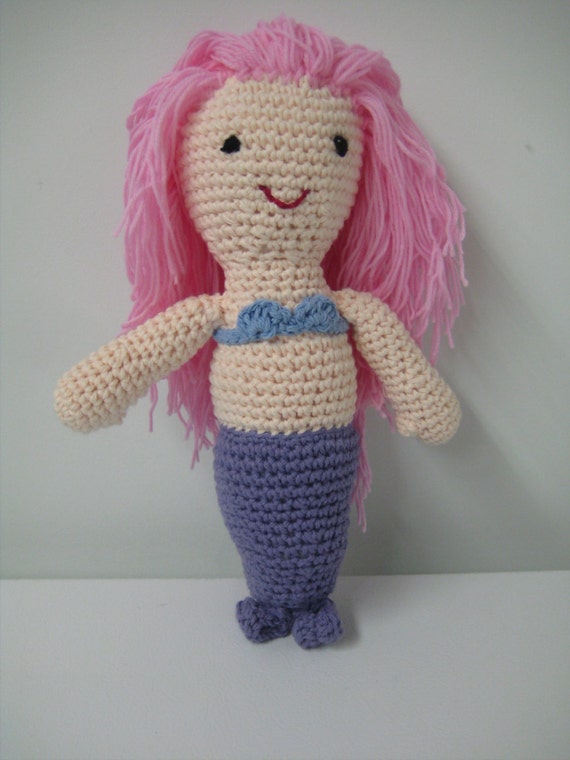
Welcome to WESTie Wednesday, where each week we better get to know a proud WEST member and their Etsy shop! Let's meet Tawny Bee, of Tawny Beean earth mama who loves to use upcycled materials in her work.


"I mostly specialize in reusable mama cloth, potty training pants and nursing pads. In the new year, however, I'm going to work towards fulfilling my dream of becoming a toy maker. I've spent this entire year learning how to crochet in order to best realize this dream. I'll be sewing and crocheting wonderful toys for kids and kids at heart. Have no fear though, I won't forget about my tried and true products! I create in my dungeon... er... I mean studio/laundry room/rec room of my house. I like to be in the fray of family life when I create. My kids are super creative and always get me thinking about things in a different way. I spend a lot of time in thrift stores where I source many of the materials you might find in my potty training pants especially, as I upcycle fun children's clothes into these fantastically helpful garments. I line them with bamboo batting, which I purchase in bulk whenever I find a good sale at whatever fabric store carries good quality bamboo at a decent price."


"I sell mama cloth, potty training pants and nursing pads (and other such things made to be reusable and absorbent). Some call me the bodily fluids lady... ummm... yeah... I guess it's true, so I'm fine with it. I also sell toy hammocks and will venture into actual handmade quality toys in the future."


"I have an Etsy shop because if I didn't create, I would go insane. Also, if I didn't sell some of the stuff I create I think I would be labeled as a hoarder and my husband would have me committed. So I guess what I'm getting at is that my shop keeps me from being insane. :P"

Looking for Tawny Bee? Check out her out on Facebook, Instagram, and Twitter!

Tuesday, November 18, 2014

How To Tuesday: Wire Doll Display/Photo Stands

This tutorial was originally posted on the Tawny Bee Website on Tuesday November 11th, 2014.

I thought this tutorial on wire doll stands would be a great one to share with WEST because a lot of us are always searching for display help for craft shows and ideas on how to take easier product photos. And it helps that this one is fun and thrifty! :D

And it's super cute as well...

Well, for almost a year now (I started learning how to crochet on January 1st this year), I've been working towards achieving a dream of mine. I have always wanted to be a toy maker. When I was younger, I was always fascinated when my mother would sew toys for us. My favourite Toy Story movie is number 2 - the under rated one - because there is a scene in it when the old toy restorer comes to the bad guy's apartment to fix up Woody before he's sold. I love that old guy. I love his precision and the love he obviously has for his job. I even have a recurring dream about a blue porcelain doll that my mom had sitting on her dresser when I was little. I only have this dream when I'm stressed out and it's basically this blue doll leading me through a maze of an ice castle that is all blue and white and that we never make it out of. I've had this dream since I was about 10 years old in times of supreme stress. Weird.

Anyhoo... I am totally in love with doll making books and knew that I had to learn how to crochet in order to better be able to make some of these fantastic dolls. So I worked and worked at it and learned really fast. I know that the only reason I caught on so fast was because I was fueled by a passion for making toys.

So, in the new year I will be retooling my little Etsy shop to reflect this rekindled passion. I will be selling toys of all kinds. Fabric toys, crocheted toys, toys for girls, boys, adults, geeks. Toys of my own design and toys that have wonderful pattern designers that have graciously allowed me to make their designs. I will also have the standard mama cloth, potty trainers and nursing pads. And the teddy beds that I love making will still be in shop because you will definitely want some storage for all your new pals! (Phew - that was a lot of shameless self-promotion! EEEPS!)

As I am getting ready to launch into a new area, I realized that I will want to participate again in local craft fairs...Which led me to thinking about displays...Which led me to thinking about how to make doll stands...Which led me to try out a few variations...Which led me to making the stands that are featured in this tutorial...Which led me to stop yapping and actually get on with this tutorial already! SHEESH.

Materials Needed:

- An old wire hanger - the more bendy and flimsy the better
- a roll of duck tape - they sell tons of cool patterned duck tape, so I went with that
- a pair of pliers - or some serious brute strength of which I have none


Time Needed:
- this is a simple one - it took me about 20 minutes to make one

Skill Needed:
- heck, if you have the talent enough to make a doll, or even go out and buy one, then you can do this project

Step One:
Take your pliers or your arm strength and untwist the hanger. You can try to make the hanger relatively straight, but don't worry too much about making it perfect. It's going to be wrapped in duck tape, so if there are bumps, they will be smoothed out anyway.

Step Two:
Begin by forming a circle on the middle of the hanger. Don't use the entire length of the hanger for this - just the middle. But make the circle as large as you feel it needs to be to make it sturdy. This is the bottom of the stand and the part that will balance the doll, so it should be the most sturdy.


Kinda like this. The two ends of the hanger will be pointed upwards for now.

Step Three:
Begin shaping those two ends. If you have a doll in mind for the stand, it would be great to measure to make sure the supports are at the correct height for your doll. The stand can be bent and moved around to fit when it's done if you don't have a display item in mind just yet though. I bent my two support ends out and around to get this sort of shape.


Keep in mind that it doesn't have to be perfect because the duck tape will smooth out any roughness. You just want two supports that will fit under a doll's arm pits like crutches. If you are looking to support something small like a Barbie Doll, you might even want those supports to touch a little in the centre (making a semi-circle) thus securing the doll a little tighter. For my purposes, I wanted the support but not too tight because the dolls will be changed out and people will want to come by and pick up the dolls to look more carefully at them - or give them a cuddle ;)


Step Four:
Start wrapping the entire thing in the duck tape. I am not the most graceful wrapper, so I ended up cutting off chunks of the tape and wrapping everything in small pieces instead of twirling the stuff around like a pro. Make sure to wrap the pointy ends of the hanger really well so that you don't harm yourself on the stand.


Ta da! Even if your wrap job is as messy as mine, it still looks awesome because the duck tape is so much fun.

Step 5:
Try it out and make more!


Here is Holly Dolly trying out the doll stand. These stands also make really good props for taking superb product photos as well. Isn't she so cute?

I made a taller one with smaller supports for Betty Boop out of duck tape that had gummy bears on it. :D


It may look a little wonky, but it works! And the great thing about these stands is that they are still adjustable with the tape on them. I could bend the middle piece back for a shorter doll or tighten the upper supports around the doll if needed.


Then you can make little scenes with your dolls.


Anna joined the party!

Wasn't that simple?

Thursday, February 28, 2013

Tawny Bee's Bomb Girls Dress

Hi, I'm Tawny Bee and Ruth (our WEST captain) has asked me to repost my latest creation on this blog to share with you! I participate in a bi-weekly challenge put on by a crafty blog in the US called Iron Craft. This was a project I made to meet the newest challenge. I happen to love the dress I made (and the TV show it's based on), so I didn't argue with Ruth's suggestion of posting on here for you all to enjoy.

The following was originally posted on Tawny Bee's Blog: The LT Experience on February 26th, 2013:
___________

The challenge this week:

"The Emmys, SAGs, Golden Globes and, of course, the Oscars, it is awards season for the entertainment industry. So, let’s make something inspired by a movie or television show OR you can make something you would wear on the red carpet." (courtesy of Just Crafty Enough)
_______
For anyone who has followed this blog, or my Facebook knows that I'm currently obsessed with the Canadian TV show Bomb Girls.

A little bit about Bomb Girls for those who haven't watched it (I think it's available on some obscure American channel now though):

Set in the 1940s, Bomb Girls tells the remarkable stories of the women who risked their lives in a munitions factory building bombs for the Allied forces fighting on the European front. The series delves into the lives of these exceptional women from all walks of life – peers, friends and rivals – who find themselves thrust into new worlds and changed profoundly as they are liberated from their home and social restrictions. (courtesy of Global TV)

Before the second season started a few months back I showed you how to make your own 1940s turban head wrap.  So I couldn't do that again for Iron Craft.

So I decided to outfit myself in 1940s inspired garb and made a dress from Retro re-released Simplicity Pattern 1777.

I went all out and did a photo shoot at the Winnipeg Aviation Museum.


I even got my hair to stay put in 1940s victory rolls.  Phew!  That took A LOT of hairspray!!

But it kinda looks like the pattern cover.


Of course, it's Canada and it's cold outside, so the boots aren't exactly great for the photos, but whatever.  And it's 2013 and there isn't any rationing going on right now, so I was able to wear tights.  Yay!


The plane that I'm posed beside is a de Havilland Tiger Moth used by the Royal Canadian Airforce during the 1940s.


I found that even my coat went well with this Bomb Girls inspired look.


And I couldn't resist hanging with the flygirls for awhile. :)

Cast of Bomb Girls


I'm thinking that this is totally a Lorna dress (Meg Tilly's character in the centre).  I love her so much!
And because this was a challenge dealing with all the award shows coming up, I'll let you know that Bomb Girls has been nominated for a bunch as well. OK so maybe they are all Canadian award shows, but still.  I love this show so much!!!!

To follow all the Iron Crafters and snoop on their favourite TV and Movie inspired crafts, check out the Flickr Group.

(PS: My favourite movie happens to be It's A Wonderful Life, which incidentally takes place in the 1940s as well, so it's a double win with this dress).

Tuesday, January 15, 2013

Supply Shopping on WEST

Address stamp from OnePlusOneDesign 

Geeky fat quarter from TawnyBee

Metal numbers from JunkSalvation 

Stone settings from BusyAsaBug

Llama bat from MapleLaneLlamas 

For local goodies for cold weather crafting, look no further than WEST! Just search winnipegteam and then select supplies on Etsy!

Thursday, January 10, 2013

Where WESTies Create: Episode 3, Tawny Bee

Hi, I'm Tawny from Tawny Bee!

I'm a work at home mommy who creates sewn items (mostly housewares) in between shuttling two kids to school, cleaning the house, cooking, attempting not to eat all the leftover Christmas chocolate I find in this house, doing the hokie pokie, breaking up sibling rivalries, finding lost socks, laundry, snow shoveling, etc.

And my work space is in the middle of all the chaos.

Welcome to my basement.

Here is my sewing machine set up against one of the walls right next to my computer.


I move my chair back and forth depending on if I'm working on Etsy on the computer, or if I'm sewing.  Of course, I usually have to boot a lazy cat off the chair before I can even do that.

Directly to my right as I'm working is usually a scene very similar to this:


Those are my little munchkins. They are pretty used to playing around me while I work. If you look carefully to the very right of the photo is the entrance to my laundry room.... er... I mean.... STUDIO of course. :)


In my studio you will find my cutting table. It should be cleared and ready for me to lay out my patterns and fabric and do some serious work. But instead it has become more of a catch all for various projects on the go. The brown basket with handles holds the squares for the Tawny Bee quilt I'm working on. The blue folded mess is an almost finished rag rug for my son. My homemade patterns are stacked underneath the basket.


Most of my stock in stored in those bins underneath the table. And of course my crafty apron that holds most of my work supplies (scissors, pens, chalk, some safety pins, a ruler, measuring tape, etc) is folded on top of the happy face box. Lace and ribbon of every sort is hanging from a pant hanger above it all.

And the beautiful mural that my son made for me has a special spot on the wall. It features trees and train tracks. Bottle Squid that I made with the kids out of empty milk jugs are hanging right above the table.  I always have my kids' creative energy proudly displayed all over my work area.


We go a little further into my laundry.... I mean Studio... and we see my ironing board.  An essential tool for anyone working with the fibre arts. And once again it is half used as a catch all.  I also use my ironing board for packaging orders.  Hence the packing tape. And another use for the ole ironing board is "snap placing" table. I use my snap pliers to attach all the plastic snaps to my mama cloth creations on this board. Hence the jars full of snap parts. I have an analog Pinterest board above me here where I "pin" all the fun things I find from magazines and general crafty stuff including a calendar for blogging, craft shows, shipping deadlines etc.

Once again, I try to include my kids' art in my work space. Their Sponge Bob art gallery fills me with creative energy whenever they pin up a new masterpiece (this time it's 3 eyed paper monsters).

A little further into my studio we find the back wall where I store most of my supplies.


Fabric lines the one shelf.  It may look a little chaotic, but I can find most everything. The top shelf is for upcycling materials and is covered with a blanket because my cat likes to lay on top of this pile and even though I wash everything before use, I don't want her shedding on any of my fabric. The second shelf features knits, fleece and velour. The third shelf is for cottons. The bottom shelf is for quilt batting. Along the side I store binding, buttons, zippers, velcro etc. You can see my giant hanger full of repair items hanging directly in front of my supplies. I figured if I hung it there, I might actually get to it one day. Nope... that hasn't happened. :)

If you look to the left, you will see my basket of mama cloth and a box full of wrapped toy hammocks on the bottom shelf. And again, above everything is the stuff for my kids - puzzles, games etc.

Devo the Found Objects Robot that I made (on the second shelf down on the left most shelves) presides over everything. He's the Tawny Bee manager and quality control. He always reminds me to do a good job and not send anything out that I don't think is absolutely perfect.

Thus ends our tour of the Tawny Bee work space. I hope you enjoyed hanging out with me today! Stay tuned for more Where WESTies Create tours.

Saturday, November 17, 2012

Squidee: A Love Story at the Holiday Market

Most of you don't know this about Squidee, but he's a very romantic soul.  And he's lonely.

:(

Being a good representative for WEST though, he put his feelings of solitude aside and went to the Holiday Market today at the UU church on Wellington Crescent.

He was going to do his best to cheer on all the WESTies at this show.  But he had other things on his mind.

He first went to visit the Sew Dandee table.  Here he sought dating advice from a Manitoba legend.


Keep calm and ride on? Kinky, but it just might work!

Next Squidee decided that his new love (whoever she may be) might need a beautiful present.   A scarf - hand dyed even!

So he headed on over to visit Leslie and her grandmother at the Blue Star Studios table.


Squidee then returned to the Tawny Bee table to regroup.  And that's when it happened.  He spied the most enchanting creature across the way.  He got tingles all the way through his tentacles.  Could it be?  Could Squidee have found love?


He gathered up all his Squidee courage and ventured over the Magination's table.  And that's where he found Pinky!  Oh look at this temptress with her wide eyes and gaping mouth so much like Squidee's own.  How could he not fall head over tentacles in love with her?


Things were moving fast at this craft show.  Squidee had to make a bold move to make sure that Pinky would be his forever.

He made his way over to Periwinkle Designs to buy a geeky ring for each of Pinky's tentacles.  


But alas... in Squidee's absence, Pinky found a new home this afternoon.  It was not meant to be.  Poor Squidee was crushed.


Monkey Business Card Co. to the rescue.  Can you spot Squidee drowning his sorrows with his new monkey friends?  They entertained him and kept his mind on all sorts of monkey business.

Squidee's heart went through a lot this fateful afternoon at the Holiday Market.  Stay tuned for further adventures of Squidee at future WEST events!

Wednesday, November 7, 2012

Squidee at the Corydon Community Centre Craft Show

Squidee has been very busy lately.  In addition to his regular swims up to the North Pole to check on Santa's progress, he's been visiting WEST booths at local craft shows.

He was at the Corydon Community Centre craft show last weekend.

Here are some highlights:


He was spotted in the sea of fabric bookmarks at the Tawny Bee table.


Then he lurked among the handmade journals at Prairie Peasant's table.


He was thoroughly puzzled at the Dragon Nerd table.


After all the excitement, Squidee settled down in his happy place at Heaven's Earth.

Squidee hopes to see you soon at another Winnipeg Craft Show! 

Sunday, September 30, 2012

Look who is coming to the WEST sale (part 1)

Here are 3 of members who will be at the WEST Handmade and Vintage Sale on October 13, 2012.

Tawny Bee


Hoshii Designs


Dandee


Tuesday, August 21, 2012

Art in the ... Garden

Fun event planned for tonight - August 21
stop by and check out the following WESTies
Cloverleaf Fibre Arts
Birdie and Dot
Tawny Bee
Nancy Blokland Pottery

Check out their blog for full features on all of the above talented WESTies and other talent that will be in attendence!

Sunday, April 15, 2012

March/April Design Challenge Results

The W.E.S.T. March/April Design Challenge was "Spring!" Members were invited to create something inspired by thoughts of Spring, and use the Pantone Fashion Colour Report for Spring 2012 for inspiration if needed. We set a new record with this challenge, as we have NINE entries!

Katie, from Hearthfelt Yarn Wreaths managed to have the first entry in this month's challenge as well! Thanks for your leadership Katie!

Spring Yarn Wreath by HeartfeltYarnWreaths
 
Katie notes: When I think of Spring, it has to be colourful and there must be green. This chartreuse coloured yarn reminded me of new grass in Spring, and I loved the texture. Soft pastel colours, inspired by Patone's Spring 2012 palate, form a plush bed of felt flowers along the base of the wreath. I wanted to create something that would be perfect for Spring, Easter, and beautiful for a special mom, too!

Next was this entry from Marlene of Magination:

Tangerine Dreams - Java Jacket Coffee Sleeve by Magination

Marlene found these new yarn colours at Michaels last week and had to nab them. Love this new spring colour!

Tawny, of TawnyBee, brought a little whimsy to the challenge with Sir Galahappy, the Chivalrous Squid:

Sir Galahappy, the Chivalrous Squid by TawnyBee

He thought that he was destined to go on a quest to find the Sea Grail, but alas, it made him very frustrated and sad. So he changed his life goals and decided that when the snow melted, he would try out an existence on land. He looks forward to many adventures and especially loves spring because there are tons of puddles to splash in - his very favourite thing!

The next entry was from waterleliejewellery:

Gold and freshwater pearl earrings by waterleliejewellery

Andrea of weareboundtogether added a splash of colour with her entry:

Purple Flower Small Duct Tape Journal by weareboundtogether

Andrea says: when I think of spring, I think of flowers: flowers everywhere and the beautiful colours they are. I started expanding into colours just in time! The difficult thing was how to incorporate the flower theme into books, especially with a duct tape cover. The stitched spine made sense and seemed like a great idea. But could I do it? I didn't know. But I made some attempts and remembered to write down what I did so I could do it again, and here you go! Now I have a few different coloured flowered books in my shop.

Deborah, of hoshiidesigns, created this bright jersey infinity scarf:

Jersey Infinity Scarf Necklace by hoshiidesigns

Deborah was inspired by the Asian flare the pattern in the fabric took, matched with the solid black, and of course, her own Japanese background.

Here's Mike and Shaunna's entry, from DragonNerd:

Fractal Necklace by DragonNerd

They were inspired by the Pantone colours, and their "bold" colour choices!

From Alison and Leslie, of BirdieAndDot:

Zipper Cosmetic Pouch by BirdieAndDot

Spring makes them think of fun and bright colours! This little cosmetic pouch features funky flowers, the teal lining has a bit of shimmer, and who doesn't love pink polka dots?

And the final entry was from Christa, of SecretJewelry:

Blue Front Amazon Parrot Feather Ear Cuff by SecretJewelry

Isn't it wonderful how talented our team is? The variety here is amazing! Thanks to all the participants in this month's challenge!

We'd love to hear from you--what comes to mind when you think of Spring?

Stay tuned for the next challenge to be announced soon!